Tuesday 28 December 2021

Plagued- Malifaux Hamelin Tactica

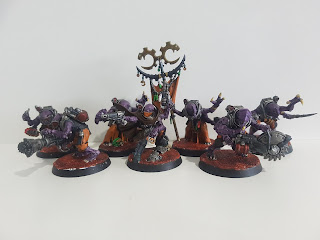
Next up for Malifaux I'm writing about another one of the Outcasts I've had a bit of a different experience with in Hamelin. I've never been a fan of the whole Rat Engine style of play in any edition, but I love the Blight Bomb builds he can do and so my personal preferences for him are based entirely around what facilitates this style (and the only times I've played him have been when this build is possible)


 Keyword abilities-

Blight Tokens- The crew revolves around Blight, but being tokens they don’t natively do anything on their own. The crew has so many ways to both apply and use them that if you don’t see Blight on enemy models start to snowball you’re almost certainly not playing the crew correctly.

Nihilism- Hamelin and Nix both have this, and at the cost of a card discard you can choose to not gain any condition. When it will likely be beneficial for you not to have it (eg against Tara on Hamelin or an already activated Nix) you can just deny it entirely, although without much card draw you’ll have to be a bit careful about when you do it

Bleeding Disease- The big use for Blight offensively, it deals damage to the target equal to how many Blight Tokens they have. Because of how Blight stacks up so quickly by mid-game you will have a ton of ways to throw out tons of damage onto the opponent and you will often be one-shotting lower wound models which is really effective in terms of thinning them out. 12" range is also excellent because it keeps you safer as well. 

Taint- a common Crow trigger, it gives Blight equal to how many Crows are in the duel total. Good to have and you'll do it fairly often but there really isn't much else to say about it

Source of the Contagion/Diseased- Passive Auras to spread Blight, Diseased is a 3" on most of the crew and Source of the Contagion is a 6" Aura on Hamelin himself. They both stack, and both of them give an enemy Blight when they activate within range so you can stack it up really quickly. 

Covered in Rats- The defensive ability of Benny Wolcomb and Rat Catchers, it just gives them Shielded +1 for each Malifaux Rat they end their activation within 1" of. It's simple but it works well enough

Demise (Agony)- Both Hamelins have this, and it lets them kill a Stolen in 6" to heal 5 when he dies. Nice way to keep him alive if needed, but usually it'll be more of a deterrent than anything. 


Keyword models-

Hamelin- The more front-line version of the Plague, this Hamelin is built to be very much stuck in instead of trying to block out opponents and keep them at arms length. His stats are very defensible, and Nihilism is great to have in this regard as well, while Coughing Fit helps not only Hamelin but any trigger an enemy does within 6" which shuts down a lot provided you can build up Blight (which you should be able to pretty well). Voracious Rats is a nice incidental summon, but otherwise there isn't much to the front of his card that hasn't already been touched upon. 
Bleeding Disease is as expected, but Siphon Life on it is quite great to have because it increases damage even more which can help get through high wound counts (and healing on your Master is always welcome). Lure at stat 7 and with Taint built in is very good and is useful for forcing opponents into your range to mess with them as best as possible, while Skittering Vermin can be useful as well to move things like Rat Kings or Winged Plague into positions where they can score for you. The Black Staff is surprisingly good melee at 6 vs Df (and with a trigger for built in Injured which will stack up really quickly) although 2/3/4 damage and a Blight isn't super high. Free Rats on a Tome is nice, and Skittering Vermin as mentioned before helps too, but in general I would only really be attacking in melee with Hamelin if he really has to because he definitely has better actions otherwise. 
Pustulent Tumours for exploding Rats is quite hilarious and actually a really good action being a pseudo-shockwave with no resist, and with Quick Reflexes you can turn an abundance of Rats into huge amounts of damage for the opponent for very little card resources from you which will always be surprising to see and still very effective. Unclean Influence as his bonus action is also very useful, as making all Vermin move 3" and take free actions is great to have and it can be used really aggressively to either form Rat Kings or move things into position for bombing via Pustulent Tumours. For a 4, and with a trigger to give all Rats in range free Focused there's really no reason to not use it unless you have no Vermin within 6" of him, in which case you're probably already struggling

Hamelin, The Piper- My preferred version of Hamelin, I really love the playstyle of The Piper and he does so much. What I'll get out of the way first is that I really dislike the idea of taking him as just an enabler for a bunch of out of keyword models, and I see his Obey as a way to mess with your opponent in huge ways and spread Blight across enemy models while also having the versatility of spreading AP where you need it among your own crew to push for scoring. Decent enough stats although easier to kill than non-Title Hamelin with 1 less wound and Df, although forcing discards to make Charges within 6" (which is also the Blight Zone) is really nice to drain resources and can help to keep him alive. The ability to spread Blight from killed models when they die is especially nice, because Bleeding Disease becomes a very quick way to rip through enemies later in the game, plus Spray of Filth built in with this Hamelin increases it even more. He also has counters to card draw crews which is especially nice control, as if they have Blight and draw cards within 6" you can discard said Blight to instead draw a card yourself and deny them one, which is a huge resource swing and can make a real difference in a lot of ways. 
In terms of actions, 2 of his 3 attacks have Tainted Chorus on a Crow to straight up give the target 2 Blight Tokens which is always very useful, and Music in the Air on a Tome to immediately push the target (which has to be an enemy) 2" in any direction. Not really useful on Bleeding Disease I feel, but on Obey is quite good to get enemies into better positions for you (meaning worse for them). Obey is pretty self explanatory and amazing on its own, but with the Mask built in and stat 7 its even better and the triggers are both good as mentioned above. Bleeding Disease is Bleeding Disease, your best damage action after very little investment. The Piper's Influence is one of the only ways in Outcasts to give Stunned, and giving your own models built in suits against the target is even better because of all the huge amounts of ways it can pay off (built-in Onslaught with Rat Kings, Taint on tons of stuff). Infestation for a free Rat is nice but you really want Tainted Chorus for the most results I feel like. Eyes in the Walls is Marker removal which is always welcome (it works on anything non-Strategy, so a great way to deal with non-Destructible Markers) and the pulse for Blight on enemies (Wp13 so likely burning decent cards) plus a free Rat is nice to have for an 8. Alone each benefit would probably be slightly high, but when you get all 3 every time it's really great and 6" pulses can mean you can hit crews a lot for those 8s if you do it multiple times a turn (Titania, Kaeris, Reva and Rasputina for example)

Stolen- As far as totems go they are very average, but they do a decent amount to support the crew. Giving Vermin Fast is expensive needing 10s (or 6s on Rats) but when you do get it its definitely worth it, plus being able to kill them for cards and rats is an ok choice if you're running low. Vomiting Disease is also an ok attack for a 1SS totem but nothing to write home about. 

Nix- As far as survivable henchmen go, Nix is the gold standard. Between Incorporeal, only being able to do Moderate or Weak damage to him (or any friendly within 3") and Soulstones he is very hard to actually damage, and then any duel failed by enemies within 3" also heals him which turns it up to 11. Nihilism is great to have as well when it matters, but its his survivability combined with the back of his card that makes him an autotake in any Hamelin crew. Loose Bowels is ok in scheming pools, and very low investment to straight up lock the opponent from doing things they want in many ways, but Drink Spirit is the more useful bonus action IMO because it can throw out huge amounts of Blight and also heals Nix a good amount of the time to make sure he's topped up. Bleeding Disease is fairly self explanatory, and Spectral Bite is ok damage but built in Taint is the main reason you'll be using it, because Nix wants to be in the middle of a scrum tanking and dealing damage as much as possible to actively screw with the opponent's plans.

Benny Wolcomb- A model I've very much spoken negatively about in the past with Bandit, but in Hamelin there's a lot more useful synergy and even though Benny is still weird, he has his uses. Using him to convert a bunch of scheme markers turn 1 into Rats, which then turn into Rat Kings, is his best use but he often becomes a bit less useful after the fact and tries to pivot into a schemer/runner killer where he's ok but not fantastic (unless there are scheme markers nearby and he becomes Fast). I like Benny, and he's important for getting Rat Kings onto the table, but he won't be putting in huge amounts of work all game directly. 

Disease Containment Unit- The new Enforcer, shared with Guard, this model is definitely more suited towards Guard in terms of kit but it still has some very nice Blight synergies with it. Armour 1 with the ability to not be affected by Hazardous Terrain, Injured or Poison is all really nice, as is +1 to duels against models that have already activated (making those blasts more reliable) but the explosion when it dies is a huge thing to look out for in Plague because it will delete any Rats you have and do huge chunks of damage to things in your crew. Rapid Response for working against markers is excellent, being able to get things out of bad situations (against Pyres? Time to get everyone back to safety) and the possible heals or Rat summons (because this is a Plague tactica after all, Hounds are a footnote at best) are great to have in the toolkit. Its Hidden Axe is ok but not fantastic, Diseased Limb reduces your Blight to make it do fairly mediocre damage for a 7SS model, but the Flamethrower is what does work in Hamelin crews. Resisting Mv is always good but even greater with Pursue, and although it isn't super high damage it gives out high Burning or optionally Blight tokens via the trigger which means you'll be tuning up the rest of your crew in some big ways. I really like the DCU for this reason alone, and the Flamethrower paints a huge target on it that the opponent can't ignore early game for the sheer threat of being covered in Blight far quicker. 

Obedient Wretch- What is basically a better Stolen, the Wretch is actually one of the better pieces in the crew I think because it is ridiculously survivable for its cost between Manipulative, Stealth and Tummy Aches (which I'll come back to soon) and having Bleeding Disease. It can kill itself like Stolen although here it is an absolute last resort, and Tossed Rat is best mainly for the triggers which are both great. Analyze Weakness and Bleeding Disease are both the main reasons you want the Wretch because it allows you to tech against Armour (with Skittering Vermin as well, so you can ignore Armour and put your Rat King into charge range). The big reason these are so great is through Tummy Aches, because not being able to cheat if they had Blight (which they pretty reliably will) means you can cheat to win with total impunity and make sure your attacks land (or you survive)

Rat King- My favourite minions in the keyword, these things are nuts. They don't look especially fantastic in any way, but they have so many ways to go above and beyond expectations so I love putting them on the table. I don't hire them, instead summoning with Benny, but having 2 by the end of turn 1 is something I'll always shoot for because trading up from hiring a Rat or 2 is just value. They can remove scheme markers from range, giving them great counter-scheming threat, force duels on things to give out Slow which is great and with pluses to damage flips they can reliably spike damage to hit the 4 or 5 damage on their melee. On that point, Onslaught is amazing as can be expected and the built in Blight explosion is great for spreading things around into the enemy crew (and with Piper Hamelin you can spread even more which gets insane). In general they're great mid-tier beaters that can punch up when needed, and even if they die they either get you a Rat Catcher (if you kill it yourself) or draw a card which is still good to have. 

Rat Catcher- A pretty good close-up scheming piece, but honestly I find myself not really taking them because of the wealth of other options in keyword and I prefer sticking with Rat Kings instead of summoning in Catchers. They can do a lot of work in pools with Detonate Charges or Death Beds and even things like Symbols and Break the Line where Don't Mind Me is very useful, I just personally don't click with them a whole lot. They are another vector to hand out Fast on your Vermin though which is really nice to have (and on a better stat than Stolen), and help a huge amount in getting Rats on the table which leads to even more Rat King possibilities. Rat Snack is useful, with some sneaky card draw in it (2 cards from a Rat) and they have a lot of good tricks on their melee as well although they aren't super amazing combat models (free Rat, Slow or quite easy min 4 are all great to have). 

Winged Plague- They're very squishy, but for 4SS scheme runners they do the job. Turn 1 will often be used to feed Benny and make up Rat Kings, but after that I find they're great ways to score points through Interacts while most of the crew wants to be gumming things up and spiking damage with Blight. The end of turn pushes on them are also really great to have too, because it speeds up already fast models early in the game. 

Malifaux Rat- They're basically glorified markers, but being able to build into Rat Kings is a serious threat and they can also put out Blight if they get into annoying positions (and they can just block off areas by existing so even with no engagement they can be annoying in terms of board control) 


OOK/Versatile models-

Emissary- As far as support pieces go this is close to the gold standard. Healing and bonus scheming are what you want it for, but it is expensive and doesn't play much into synergies with the rest of the crew. I like it a lot but it's also one of the first things I'll go to drop

Big Jake- This is what you take for aggressive scheming options that can bring itself back if/when he does die. Not essential (I certainly get enough success out of Winged Plague most of the time) but also very useful if your opponent can clear out models quicker. 

Hans- The option here is for having ranged shooting options early in the game to force engagements with the opponent and punish them for staying away from your bubble. 


Upgrades-

Servant of Dark Powers- If you're hiring Rat Kings this is great, but it also does good work on Nix if you spare the stones for it (although 2 stones to reduce damage is also good to have for Nix)

Wanted Criminal- Although the new version of the upgrade as of 2021 is a lot better, I don't think there's really a great use for it in Hamelin crews except maybe Benny. Even there though it isn't fantastic

Soldier for Hire- Hard to Kill is always good, but for 2SS on the models you want it on you may as well just bank the stones for more versatility


Deployments-

Corner- while the crew isn’t necessarily fast it isn’t slow either, although Corner means you won’t really be getting into the game in a big way until turn 3 and it makes it a lot harder to start the snowball of Blight

Wedge- this only really exists as a way to spearhead Nix into the enemy crew and shoot out Blight as much as possible, but with such an awkward deployment zone and trending towards higher model count Wedge is a big pain for Plague crews

Flank- unlike Corner, you have close enough deployment zones that you can effectively get into the enemy crew earlier and get Blight onto things when you need to early/mid game

Standard- fairly average, not much else to say


Strategies-

Reckoning- I don't think you could give away points easier if you tried. Nothing in the crew other than Nix and Hamelin are particularly tough to kill and they also don't have huge amounts of damage until later in the game

Turf War- My main take for Hamelin in the GG0/Rulebook pool, Turf War is somewhere you can do a decent amount of scoring provided you get your placement right. Early game you will easily take both markers in your half, then you can push up and make sure the centre one stays in your control while you annoy the opponent as much as you can and dish out damage to make sure you can hold 3 points on the table which in turn denies your opponent. 

Corrupted Idols- This would be my 2nd pick for Hamelin, but it needs a bit of management to pull off. You can get totally screwed by initiative flips here even if you try and make sure you can get 2-3 markers covered and the fact you want to bubble is somewhat detrimental to the strategy. You can however all but lock out the opponent putting them back over your half with Blight so the denial game and playing for 2-3VP isn't a bad take

Plant Explosives- Not bad, but not great either. Kings and Winged Plague can get into awkward spots to place bombs down but you really need to push into the opponent's half to benefit and Hamelin doesn't really like doing that in general


Schemes- 

Detonate Charges- With how Hamelin likes to play a scrum style of game and the many ways you can get scheme markers onto the table Detonate is one I like to take with him, because he can lock down an enemy model with some degree of reliability

Breakthrough- Not bad with Winged Plague or even Rat Kings, but its risky so you have to be a bit careful with how you play it

Harness the Ley Line- Not a bad option, but not fantastic either. That's about all I can say really it depends on what other schemes there are and if you can accomplish both easily

Search the Ruins- Not terrible but you don't want to be pushing too deep into the opponent's half because it has diminishing returns very quickly, so it depends on board state

Dig Their Graves- With no non-scheme marker placement in the crew outside of dying (and your most expendable models don't drop corpses) the 2nd point isn't very reliable, but the first is ok enough given you can pull things into the bubble and make sure it dies where you want to with some reliability

Hold Up Their Forces- This is fairly easy to achieve and not a bad take for Hamelin in general, I like it a lot

Take Prisoner- Any model you choose for this is either too important to the crew (Obedient Wretch), fragile (Winged Plague) or rewarding to the opponent to kill (Rat Kings/Catchers) that you don't want to be putting them into a position where they will also be denying your scoring as well. It's good for a fakeout if you can get other schemes but I would recommend not choosing it. 

Power Ritual- Corner or Flank only, and even then you shouldn't be splitting up with Hamelin to do it

Outflank- You don't want to do this. Keep as one otherwise the crew is easily picked apart

Assassinate- Hamelin is tanky enough and you can get big spikes from Blight in the late game (especially when other things die with Piper and you can shove all their Blight onto the enemy leader for Bleeding Disease damage) so Assassinate isn't a bad option if you can lock down the enemy leader in your bubble

Deliver a Message- First point is easy, 2nd is almost impossible. Playing for 1 isn't bad though with Hamelin 

Claim Jump- You can almost guarantee this with careful play, using ablative models to crowd out the zones and keep the centre blocked off

Vendetta- If you can get Nix on anything 8+ cost you can do some good work here because you hit it a couple times early to get point 1, Nix should survive and you throw Bleeding Disease at the target until it dies (and it should pretty reliably)


GG1

Strategies- 

None of them are especially fantastic for Hamelin, mainly because they incentivise non-place speed which he doesn't have much of, although he can play hardcore denial and grind the opponent out on attrition while he scores 1-2 points from the strat


Schemes- 

Breakthrough, Take Prisoner, Vendetta, Assassinate, Claim Jump- Nothing changed here, so my points from above are still my opinion on them. 

Hidden Martyrs- some excellent choices in Hamelin's keyword, chief among them the Obedient Wretch, I really like this scheme for Plague

Sabotage- depends entirely on the deployment. Flank and Wedge it's a lot easier, Standard it's OK and Corner I would never pick it

Catch and Release- of the options you have for keyword minions, all of them are going to be high enough priority while not being super survivable that you'll likely not score both points, but you can body block Hamelin and Nix well enough (Benny is more difficult) to deny the opponent

Let Them Bleed- you don't have high enough damage outputs outside of spike damage and this scheme is very difficult to pull off

Leave Your Mark- I don't mind this option because you can block off the area pretty safely and pull things away from it as well, and Hamelin likes to operate around the centre of the table anyway

Research Mission- no special markers in keyword, I wouldn't bother with it

Spread Them Out- it's possible with Winged Plague shooting off to the flanks, but you have to make sure they're safe or you just give away the VP

Runic Binding- not a bad option, but not especially an amazing one either


GG2

Strategies-

Symbols of Authority, Corrupted Ley Lines- Same as in GG1, my thoughts are the same. Mainly playing a denial game here while getting 1-2 VP yourself

Turf War- Same as it used to be, same opinion as before

Break the Line- Between the amounts of movement and free actions both versions of Hamelin can give this isn't a bad option, especially because you can get quite a lot out of most keyword models this way. Winged Plague have the most effective double-tap being Vermin and can benefit from a ton of extra ways to do things in the keyword


Schemes-

Breakthrough, Vendetta, Assassinate, Hidden Martyrs, Research Mission, Let Them Bleed, Catch and Release, Spread Them Out- These are all very much the same as before and I wouldn't change how I play them now.

Detonate Charges, Claim Jump- They’re the same as GG0, same as my thoughts there.

Death Beds-  With no marker placement in the crew (and your victim models not dropping corpses either so you can't just kill Rats to make it easy) this isn't a great scheme to take

Monday 25 October 2021

The Pariah- Malifaux Leveticus Tactica

 As a planned big push to cover all the crews I've got for Malifaux and actually play (and a bit of theory for me to work things out better in those crews) I'm starting to finish off Outcasts in terms of tacticas. I've decided to start with Leveticus, because his crew is somewhat straightforward but also because his new title and the ability to take the 4 Horsemen is something I am really excited for so I want to play around with that a lot more. 


Keyword abilities-

Entropy- A 3" aura where enemies activating take 1 damage, when it's on the whole crew you really don't want them to engage with you (but they will). This plays into what Leveticus and a lot of his keyword want to be doing, and is the best use for summoned Abominations that can then act as roadblocks that punish the opponent. 

Unmade- The offensive defence ability shared by almost all of the keyword, this is a Tome trigger on Df and Wp (built in on Leveticus and the Desolation Engine's Df) to deal 1 Irreducible damage to the attacker. Vengeance on Kirai's crew is amazing for this reason, and although Unmade costs resources and isn't passive it is much the same in how it punishes the opponent for attacking you even though they will want to. 

Withering Away- Another 3" aura, this one anti-healing which has a lot more applications than you would think. It stops a few Demise abilities, shuts down any Chronicle from happening and just not allowing healing is good in itself. In damage-based crews it just makes what you're doing that much more reliable and that alone is great. 

Desolate Warping- On all of your melee beaters there is the Tome trigger to summon a Slow Abomination in base contact when you kill models in melee which is really interesting because you can use it to feed your Desolation Engines, hunt weak models to potentially build up to a new one, or just use Abominations as roadblocks and pests to annoy the opponent. They do all have Necrotic Decay to boost their damage which is often more useful, but if something is on low enough wounds you can all but guarantee the kill this is always worthwhile

Necrotic Decay- The other trigger for the beaters, this one lets them deal damage to themselves to boost the damage they deal and is the main reason wounds on your crew are a big resource. With Servant of Dark Powers, and the built in healing on Death Touch, you can pretty safely use it to bring you closer and to guarantee kills on your enemy which is a big boon. If you can leverage it with healing it is very likely that the wound cost won't be a huge downside and work in your favour. 


Keyword models-

Leveticus- In general Leveticus is really simple and no-frills in how he works, especially in terms of his keyword. Unmade (built in on Df) and Entropy are as to be expected, but he can also heal models within 3" of enemy models that take damage from either of these abilities provided they are within 6" of Leveticus as well (basically making Entropy a much better version of Life Leech, and adds pseudo-reduction to Unmade). His stats are all very average, and with 10 wounds his Channel ability to suffer 2 Irreducible damage to gain Focused +1 it means he really wants healing and to avoid getting hit, although he can come back by using Waifs via his Demise ability which is really good to have. Although it isn't the really reliable respawns it used to be, and a lot of things can ignore Demise and thus turn it off, it still makes Leveticus a very hard model to actually put down and keep dead. 
In terms of attacks Leveticus isn't exactly high damage base, but he can do consistent damage and spike high enough at the cost of his own wounds. Stat 6 on his shooting (at 12" range as well vs Wp, both very nice things) and melee are both great, and 2/3/4 Irreducible is also good but it's his triggers that make both actions. At range he can stop the opponent from using Soulstones or Resistance Triggers on a Mask meaning he is far more likely to land damage, while on a Crow he gets Soulstones back when he kills them and both just make you more efficient and reliable at the job. His melee has Desolate Warping for some incidental summons, but Necrotic Decay is what makes him really great because having possibly 4/5/6 Irreducible damage (with somewhat reliable Focus) will tear through models very easily.
In terms of his tactical actions, his bonus action lets you look at the top 3 cards of the deck and discard any (at the cost of a wound for each discard) then also put them back in any order you choose. This means you can be super consistent with the damage you want to deal and you know when you can best use Necrotic Decay or Desolate Warping to get the most benefit. Essence Transfer is also very interesting, because for a 4 you can pull 4 wounds off of one model (or if it has less than 4 its current wounds) and put them onto another model within range. At range 12 you can pretty reliably make sure most models are in range, and it keeps your value models topped up. 

Leveticus, Pariah of Blood- The new Title version of Leveticus, the big thing is that he is now a Horseman and as such is Mv7 and Ht3 with Unimpeded. He can't spend his own wounds in any way unlike the original version, and he loses his Demise ability and Unmade but he does have Hard to Wound, Df6 and an extra 2 wounds anyway which will help a lot, and Entropy is a bit of a deterrent against melee models as well even without having the option to heal things at the same time. Leveticus doesn't generate Fate Tokens like other Horsemen, but he gains them when friendly models either die or spend their own Fate Tokens so he gets a lot out of taking Horsemen with him (and if you're taking this version of Levi, you are). He has to spend 2 to get a single suit unlike the Riders, but he does also have the option of spending Soulstones so it's easier for him to get suits anyway. The big thing to note on his front of card is that he doesn't get access to anything that isn't Amalgam, Horseman or Versatile meaning his crew building is a bit more restricted but you have more than enough great models to use anyway so this is really only stopping those who would piece together the strongest OOK crew and is far from making him actually bad.   Unlike the other Riders he lacks Ride With Me, but as a master he's quicker anyway, and he has some other very interesting actions to play around with that will help a lot in game. Dispel Magic for condition removal is always good and is really just important to have in a crew, plus the 2 triggers on it for healing 2 or a Pass Token are both excellent. His melee attack is fairly simple 2/4/5 vs Wp and 1" range, but with a trigger on every suit and being able to declare as many of them as you choose is what really makes it, with each one stacking up as well with multiple of the same suit. Tomes are enemy only, but card draw is great to have, Clear the Way shoves things around a great amount on Masks letting you set up your own models or put enemies into places where you want them to be (and the opponent doesn't), Rejuvenate healing Leveticus on Rams is great but especially relevant into things like Assassinate where the opponent wants him dead, and Crows for Severe Injury sets up a lot of other things in the crew in a few different ways (reduced stats is the main one, but Waifs being able to pop things as well). Soul Harvest can hurt a lot of enemy models for low damage, but it does have no resistances so it's great to ping down crews with large amounts of reduction because it bypasses most defences and can stack up quickly. The triggers are both good as well with the ability to kill one of your own Amalgam Minions (which will mainly be Waifs and Abominations) for cards is great especially if you are summoning them, while the Mask trigger gives you a ton of extra movement that is great for getting things into position for them to do more work later on. His bonus action is very interesting because it works in a lot of ways, but the main point of it is to pull a single Fate Token off of one Rider and put it on another (or Leveticus himself, but that's lower value IMO). Leveticus also gains one in the process because the cost is for a Horseman to discard a token, and a 5 is really easy to move it around and make sure you can hit some of the better triggers early on in the game (you can get to 5 suit triggers on 2 models on turn 2 with the right cards). The Crow trigger to summon an Abomination or Hollow Waif is really good to have because it's such an easy summon, and Masks to take it again gets a bit extra efficiency and put it out where you want Fate Tokens to get the most benefit (pushing Pale and Hooded to their late-game triggers earlier is the best use IMO)


Hollow Waif- Levi's totems, depending on which version you're using they have entirely different applications. With the original Leveticus they are his respawn points, and you need to keep them safe to make sure he gets to return if he's killed but also make sure they will be in points where Levi can actually get back into the action fairly easily if/when he dies. With the Pariah of Blood however, Waifs become entirely expendable and there are a few different uses for them. The first is for Levi to kill them for cards via Soul Harvest, but what you will use more often is a sort of Injured subtheme where they become similar to Stolen in Hamelin or the Zombie Chihuahua and doing big spike damage on enemies with stacked up conditions. 

Rusty Alyce- The keyword's main ranged piece, Alyce is really quite good at it although she is very slow now. Df5 and Wp6 are decent as is 9 wounds at cost 9, especially factoring in Unmade and Armour +1, and Entropy is as can be expected. Rapid Fire is what keeps her as a shooting piece giving her an extra shot at the cost of a card which is great to have, especially with her gun. At stat 6 vs Df and 12" range she is somewhat consistent, although with no positives built in suffers vs Concealment and various defensive abilities (much like Mad Dog though, who is also very high damage at range). 3/4/5 and ignoring Hard to Wound makes for easier ability to hit higher damage, and Execute cuts through opponent's resources with the threat of outright killing them (or does just outright kill). Her melee is nothing special, but if she does get engaged it isn't terrible and Injured is quite good especially built in. Her bonus actions are both useful, with Aetheric Healing being a nice heal that you can use to either just keep her alive or to fuel Leveticus moving wounds around the table and keep other models going as well, while Create Trap is fairly easy to create zones that deter opponent's from engaging your own models unless you want them to. On a model that doesn't want to engage like Alyce it's very good to have. 

Ashes and Dust- A model that has long been a bit of a boogeyman in terms of what it does, Ashes currently is still an excellent 9SS Enforcer but not without weaknesses. 6s  for Df and Wp and 7 Mv are all as good as you could possibly ask for, especially because Ashes ignores terrain and models for movement and Hazardous Terrain doesn't affect it so you will easily be able to get where you want to. Entropy and Unmade are both standard, and Nihilism can eat cards but it helps to keep him unaffected by conditions when they would hurt you (Slow and damage conditions in particular). 8 wounds is ok, but then you look at his Demise and what the Ashen Core and Dust Storm do (which I've written below) and you have a model that isn't quite as efficient as Demise:Eternal but is still hard to put down unless you focus it and/or ignore Demise abilities. With this said, given what Leveticus does you are likely to see things that can get around Demise (mostly vs Ten Thunders and Resurrectionists) and you will want to either hide from them or focus them down and kill them as quickly as possible before they can counter you. Ashes' melee is good but not amazing, although Desolate Warping and Necrotic Decay help you do exactly what you want to be doing in the crew and with Necrotic Decay you would never get any higher than 2/4/5 damage anyway for balance reasons. Like the Wind is a good way to move Ashes out of engagements, and even possibly reach things you couldn't have before for a little bit of threat extension. Speaking of threat extension, if there are Scrap markers on the table (Mei Feng in particular) Whirlwind of Scrap not only gives you a free 12" move on a 7 which is insanely good, if you also move through other Scrap you will trigger Savage Winds and can deal 1 damage to any model you move through if you remove a Scrap (which is almost always pure benefit for you). Draw Essence is potentially ok, but I prefer Ashes to be hunting isolated scheme runners and working around the edges of the enemy crew where he it is easier to reform if he does die. 

Ashen Core and Dust Storm- The summons created when Ashes and Dust dies, they create a fun little mini-game in the attempt to combine again. The Core can't move, so you have to make sure the Dust Storm can reach it and be able to reform again (although the Storm is very quick) and really the Storm will spend any AP it has to get to the Core because you want Ashes and Dust not the 2 separate. Neither of them are particularly easy to kill, although if something ignores the armour on the Core it's game over because with Df1 and no other defensive tech it will die so you will have to keep it safe. 

Marlena Webster- An enforcer that acts as more of a defensive lynchpin of the crew, Marlena is a model that wants to be in the middle of the action and can do a decent amount while she's there. She does lack both Entropy and Unmade which is very important to keep in mind, but she does have Withering Away to link her to the rest of the keyword, plus Armour +1 and Df6 defensively on top of her 8 wounds which is great. Her Df trigger on a Mask will keep her safe while also doing some damage to the opponent (and it's also After Resolving, so she can always do it as long as she gets a Mask) and she has a bit of anti-scheming with Steadfast Protector to do a not-Charge against any models that Interact within 6" so she can stop them from doing more to score points against you. Her big boon is Soul Tether, a 6" aura that lets her pull a single damage off any non-Minion within range and put it on herself. She can do it on any damage, even Irreducible, and although you're really just moving it you're helping the rest of the crew by keeping them further from death. Her attacks are fairly average for the keyword, and her bonus action heal helps keep her standing while she uses her own wounds to defend the rest of the crew while also giving a bit of card draw built-in. It isn't massive, but you will definitely be using her heal most of the game. 

Soul Battery- I talked about this model a bit with the title for Jakob Lynch as is linked, and I touched on how I think about it with regards to Leveticus there. It's 4SS significant which is great, and it gives some extra bonuses to the crew with regards to using Soulstones and Cheating Fate (always nice to have) but the main thing is being able to give your own Riders extra Fate Tokens which is massive. The efficiency it brings the crew means I am strongly considering it all the time with the 4 Horsemen (leaving you with 2 Soulstones to use in game, which is low but you don't need too many anyway). 

Desolation Engine- As far as 10SS beater minions go these are probably the most fragile in the entire game with Df3, but otherwise they have pretty good stats on their front of card, and they have some ok defences in Terrifying 12 and Hard to Wound. Unmade built in and Entropy are fairly standard, while Flurry just shows how they are supposed to be melee models above all else, and their melee is pretty good as well. With Necrotic Decay built in to boost their damage to 3/5/6 or even 4/6/7, but also Consuming Touch for a nice heal to keep them going, and they also have Desolate Warping as a trigger which with their bonus action is actually the highest potential healing they can get (especially when you have Servant of Dark Powers as well). Draw Essence will mostly eat cards from your opponent but it's an option if the Engine gets swarmed, although I don't really think that's a good option as opposed to just hitting them most of the time. Desolation Engines in general aren't really great considering the other amazing beater options in keyword, but they are definitely a lot of fun to use

Scavenger- Not the greatest in terms of raw stats, but Scavengers are pretty good utility models even after their 2021 nerf. They have 2 decent attacks, and Armor in combination with Unmade is pretty good but there is really 2 applications that make them great- Tools for the Job and Weird Device. Tools lets you pick cards off the top of the discard pile and then discard a card to gain that suit until the end phase (so if you pitch a Tome you get built in Unmade) but in general it has a lot of uses- giving you your choice of triggers for the whole activation even with weak cards, and for putting high cards back in your hand after you've used them. Weird Device needs a 7 normally (5 if on Amalgam minions) and gives Focused +1 to any model within 6". It's simple, but the triggers are what makes it even better as they can do a huge amount (heal 2 or push 4" on the target, draw a card or remove a marker) and all will have uses in most games if not all of them. In current games I would only find myself taking 1 Scavenger I think, unless its in a double Deso Engine list where I would take 2 Scavengers to support both Engines. 

Necropunk- As the scheme runners of the Amalgam keyword, and they are excellent at it. 5SS and with a pretty poor statline, they do however have 6 wounds, Hard to Wound and Armour to make up for the weaker defensive stats. Their melee is ok but not really what they want to be doing, and what they want to be doing is using Leap and making Interacts to score you points. It's a simple job, but they do it well enough you will usually want at least one in the crew. 

Abomination- These minions are pretty much roadblocks, but they're not bad at it. 4SS significant with all the stats you could expect (that is to say, not good) but they do have some decent abilities on them to help their job. Withering Away and Entropy means when you get near models they aren't going to have a good time of it, while Unmade and Hard to Wound means they're annoying to actually take out when they get there. Their melee attack is not good, but for a 4SS model you can't really expect much and they have 2 good built in triggers which is nice, and being able to give out Injured at range and also heal on their bonus action is very good as well. They can combine with 2 other Abominations within 2" for an AP to become a Desolation Engine which is a really good way to get one in the crew especially if they are all summoned, and this is the main goal I think because that is a very good outcome. With a few ways to summon them in keyword they're important, but not mandatory as you will likely not hire them


The 4 Horsemen- Pariah of Blood also has the Horseman keyword as I mentioned above, and so they really should just be a separate section on their own. I think it really comes down to which Riders do you take when you only take 1 or 2 (if you're taking 3, just take all 4 IMO) and I would probably rate them in the following order

1- Pale Rider- Out of all the Riders this one is probably the most tuned into reliable damage and will dominate a big section of the board which is great to have. It has 4" extra range up on the Mechanical Rider and the Ram trigger on the Rifle is excellent especially when you can combine it with Hollow Waifs to capitalise on the Injured in big ways. The bonus action, although not as immediately great as the Mechanical Rider's, is great just because it's quite a lot of ping healing and even though Pariah of Blood doesn't spend his own wounds there are still other things in the keyword that can and healing is good in general anyway, without even considering the triggers. Shielded +2 is great, especially when also removing Injured if that matters, but Devastation is a good way of dealing damage and especially Hatred Unleashed with all 4 Horsemen because that can wipe out most models if you can manage to get more than one Rider into combat with them and land hits. 

2- Mechanical Rider- The most versatile Rider, but also the one that can turn games the quickest with it's 5 Tome trigger. Although it's gotten a nerf in not being able to reactivate Riders (which is more applicable the less Riders you have, and of very little value with all 4) it is still excellent on the right models and can be game winning all on its own. It does good damage and is quick on its own as well, with the Mech Rider being your main scheme runner if you take all 4 Horsemen but also just another excellent one otherwise. Revel in Creation is just free markers and you can use Scheme and Corpse especially with the other Riders. Insight and Innovation can both help in huge ways with the other Riders, giving them the suits they need to do the things they want to do on their triggers and at lower cost (you can do Innovation every turn after the first and play Mech as more of a support piece for the other Riders this way)

3/4- Dead and Hooded Rider- The 2 min 3 beaters, you would think I would be promoting these first but they lose a lot of range being melee-only models and they don't have as much game-affecting ability with their bonus actions until right at the end, where the Mechanical and Pale Rider are still amazing as well. Blasts on the Hooded's melee and positives to damage are both excellent especially together (and in combination with the Pale Rider) while Reap on the Dead Rider to pull things where you want them and also get extra movement on the Dead Rider are both great, while their bonus actions both have interesting applications but neither work immediately. A 6" pulse of Injured to all enemies is huge and combos with Waifs well, while Revel in Secrets needs a little bit of setup but can give you a certain degree more control over your opponent as you can better guess their plans. Both 3 suit triggers are ok but I would rather save the tokens for later in the game, as a single free attack from the Dead Rider is ok and moving your other models around with the Hooded is nice but they aren't as worthwhile as the huge amounts of versatility the later actions bring. Malifaux's Revolt on 4 Masks with the Hooded is a huge bubble of Hazardous terrain which is really nice to have for board control, and Moonlit Charge to kick off an activation for 5 Masks is just excellent and will hurt the enemy crew a lot with the positives to the damage flip on every attack. With the Dead Rider, the 4 Crow trigger to summon Mindless Zombies isn't as great as it would be in Resurrectionists because you can't guarantee the 5 Zombies like Ressers can, although it can still be good to create roadblocks for the opponent outside of Abominations, but Soulfire will be massive if you're playing against the right opponent (it single-handedly destroys Hamelin) or if you have enough weaker enemies on the table to finish off. The 1-2 punch between Moonlit Charge and Soulfire is potentially ruining to any crew, and bubbles will have to play very carefully to avoid this while also managing the other Riders. 


OOK/Versatile models-

Prospector- ol' faithful for me, it schemes and it gives more Soulstones. Both are always good to have and it helps Leveticus with damage reduction and not dying unless you say so.

Mad Dog Brackett- There are a lot of people that call for taking Mad Dog OOK almost always, but Amalgam is already such a damage-heavy keyword that I wouldn't reach for him unless I knew I would really need to destroy terrain.

Effigy/Emissary- Both bring healing, and with Leveticus wanting to spend his own wounds to gain attack buffs (also Ashes and Deso) having reliable heals on a model that also helps the scheming game is really great to have


Upgrades-

Wanted Criminal- Not a bad take, but mostly a bit of a meme in Amalgam. Disguised on Desolation Engines is hilarious but otherwise I think you're better off without it

Servant of Dark Powers- 2 Desolation Engines both with Servant is probably the funniest thing you can run in Amalgam, but it also isn't really great. Leveticus loves having Servant on him for the heals and Herald too

Soldier for Hire- Hard to Kill is always good to have but I don't think it's super mandatory in Amalgam crews


Deployments-

Amalgam in general have a few ways to get up the table, be it Leap, Ride With Me or Herald from Servant of Dark Powers (and Ashes and Dust being quick) so most deployments you should be ok. Corner and Flank give you really wide board edges and Necropunks and Ashes really want to play with those so you can do some work there, although it gives a bit less board control in terms of reaching things to melee


Strategies-

Reckoning- As a high-damage crew Amalgam are really great at this. Just so long as you can keep them alive for long enough to out score the opponent you'll be fine

Turf War- Same thing as Reckoning, but you also have the mobility to hit the deep markers and put a lot of pressure on the opponent

Corrupted Idols/Plant Explosives- Tilting a little bit from what you have above, but with Ashes and Dust and Necropunks you have plenty of mobility in the keyword (even more with the Riders) and can easily get where you need to go


Schemes-

Detonate Charges- Good combo with some other schemes, and dogpiling enemy models is never a bad idea for Leveticus but it needs really precise placement and can only be done through normal Interact actions so is tough to pull off

Breakthrough- With only a single Necropunk slipping through this is done, and with more it's even easier

Harness the Ley Line- Its pretty good, and you can do it easily but you also have to consider what your other scheme is because it can force you to dedicate AP into the middle of the table where your other scheme might not need you to be

Search the Ruins- This is really easy because of how the crew can spread out so I would pick this fairly often

Dig Their Graves- It's ok, but with no ways to get easy scheme markers into engagement without the Emissary I think it's something you will have to play very carefully to get maximum value out of. The 2nd point is also a lot harder to get because of attrition

Hold Up Their Forces- Leveticus has access to a lot of expensive models, and it is very likely the opponent will have easy VP from this scheme. With that in mind I ideally wouldn't take Leveticus here, but the models he does have can fairly reliably kill to deny it even if I wouldn't take it to score from (unless I was also taking Deliver a Message)

Take Prisoner- If there is a weak enough enemy model you can afford to keep alive all game this is pretty achievable, but it will likely restrict your movement in a few ways so that's important to keep in mind as well

Power Ritual- As usual, I would never take it in Wedge or Standard deployment but it does have good game into Wedge and Flank

Outflank- If you put Ashes and Necropunks (or even 2 Riders) this is about the most reliable you can do it. Ashes here is almost guaranteed to come back as well making the game even harder for the opponent so at least one flank is safe

Assassinate- A very big double-edged sword, I would personally lean towards not taking Leveticus here although he can do alright. It is a very easy thing for the opponent to choose against you and get at least one point, but you also have a lot of damage to dish out

Deliver a Message- It's not difficult to achieve, but a lot of the time Amalgam crews want to just kill an enemy Master more than leave them alive. It's a big tradeoff but if you're playing for a 6VP game forgetting End points this is a great take. 

Claim Jump- Not bad, but not great either. If you can put Rusty Alyce here and keep her unengaged this is a dream scenario, but still not that likely to happen because they will want to keep her engaged even when you’re trying hard not to make it happen

Vendetta- With a lot of high-cost priority targets and no great lower-cost damage dealers this is a bit more of a struggle. If there are some 10SS models that are more fragile on the table I would go for it and blast them away with Alyce, but otherwise it isn’t really that great


GG1

Strategies- 

Symbols of Authority- Send a couple Necropunks at the Symbols, or Ashes, and you can very easily get your points from it

Recover Evidence- Send the killers in to force drop markers and the schemers to pick them up. Pretty simple

Corrupted Ley Lines- A little bit harder because some of your best movement (Necropunks) lose the ability to Leap with this, but Leveticus still has a ton of options for scoring it. With the choice of 6 different Mv7 models in keyword almost all of which have possible extra movement on a bonus action (Pariah Levi, Ashes and the Riders) this is super easy to do and none of them are particularly easy to kill. 

Public Enemies- Slightly harder than Reckoning is, but not massively so and you'll play it exactly the same. 


Schemes-

Breakthrough, Take Prisoner, Vendetta, Assassinate, Claim Jump- Nothing changed here, so my points from above are still my opinion on them. 

Hidden Martyrs- There aren't really great combinations of things to choose from because the only really valid combinations are 2 Minions that aren't really hard to focus on, and the majority of the keyword is 9SS+ 

Sabotage- Not a bad choice because you can just fling the crew at it and you should be able to get there by turn 3/4

Catch and Release- This one isn't the easiest, but it isn't always a bad choice either. Being friendly Minion only you're almost definitely using a Necropunk for it because it can get in and out fairly reliably and is somewhat more difficult to kill

Let Them Bleed- Not a bad choice, because you want to be killing things and this supports that. You do have to be careful of burning through your own wounds though because it is a really easy choice of scheme against Leveticus as well

Leave Your Mark- Not really difficult, but also not difficult to counter. I don't rate it very highly because I prefer my scheme runners to be working on the flanks, but you could go for it

Research Mission- I wouldn't recommend it because you can't really get non-scheme markers out in a great number with reliability (although you can, you have to hire and plan very specifically for it)

Spread Them Out- With the speed in the crew this is pretty trivial honestly

Runic Binding- While not easy necessarily, it is still achievable depending on the opponent. I wouldn't take it because you don't really have any ways to make it easier to score if the opponent doesn't let you do it


GG2

Strategies-

Symbols of Authority, Corrupted Ley Lines- Same as in GG1, my thoughts are the same.

Turf War- Same as it used to be, same opinion as before

Break the Line- Not too difficult because you can move things to them quickly and there are a lot of ways to double move a marker in a single activation between Riders and Necropunks


Schemes-

Breakthrough, Vendetta, Assassinate, Hidden Martyrs, Research Mission, Let Them Bleed, Catch and Release, Spread Them Out- These are all very much the same as before and I wouldn't change how I play them now.

Detonate Charges, Claim Jump- They’re the same as GG0, same as my thoughts there.

Death Beds-  You can do it, but at the same time you're relying on either your previous kills, Rusty Alyce or the opponent so it isn't something I would really take

Saturday 9 October 2021

On the Table- Guild Ball Alchemists, Brotherhood of Steel

 With this hobby update comes another big change of tune, because it's again me jumping into a new game system. I've long looked at Guild Ball and after it's "death" last year I somewhat wrote it off, but recently found a ton of stuff at good deals and picked them all up to get into the game. 

The faction that always caught my eye were the Alchemists Guild, and especially both versions of Katalyst. I managed to find the complete team roster for them (Kami and Soma are on the way) so I have all the options, but there are some I love the look of far more than others and will likely play a lot more (Crucible, Katalyst and Smoke). From here, the other Guild I picked up were the Ratcatchers, complete with Vet Graves and Bonesaw. I'll be getting these done fairly soon so they can also hit the table and I can call Guild Ball complete!

I also got a delivery for the last 2 sets I needed for the Brotherhood of Steel to finish off the faction for Fallout:Wasteland Warfare. Pretty simple, but I picked up all the named characters from Fallout 4 and got them painted so I can call the faction finished (and next up for Fallout is the Enclave and some robots)

Monday 4 October 2021

List Discussion- Scarecrow (Arkham Knight)

 Back to Batman for another List Discussion, this time I'm looking at Soldiers of Fortune for my favourite leader, Scarecrow. As opposed to the more combat-heavy playstyle of most of the SoF boss options Scarecrow plays a control game, and boy does he do it well. I'll be talking about 3 lists today, one a pure Scarecrow and henchmen list plus 2 bringing other characters to double down on the control theme- Bird and Zsasz. 


Scarecrow (Arkham Knight)
-Secret Laboratory

Cuchillo
-Backpack

Militia Soldier 1

Militia Soldier 2

Militia Lieutenant
-Gas Mask

Militia Medic

Stealth Op
-Venom Dose

Malicia
-Gas Mask
-Venom Dose

Infiltrate Op
-Gas Mask
-Fear Gas Dispenser

Die Hard

I'm Feeling Weird

Stick to the Plan

Black Ops

Cyber Attack

Domination

Free For All

Global Offensive

Ground War

Invasion

A City In Fear

This list is my main go-to when it comes to playing Scarecrow, and it's really straightforward. The henchmen all work to score you cards as soon and as often as possible, with a lot of your cards being played in enemy activations to keep your deck flowing a lot and ideally bringing high VP turns early in the game. Scarecrow meanwhile does Scarecrow things, bombing out his Fear Gas through Infiltrate Op and Malicia because they have the most tanking potential in the crew (although they are also high priority targets, they have the stats to justify having the gas on them). It also has a great amount of shooting potential and melee threat for when you need it, although with the deck you won't be fighting as much as some other SoF builds. 


Bird (Boss)

Scarecrow (Arkham Knight)
-Secret Laboratory

Militia Soldier 1

Militia Soldier 2

Militia Lieutenant

Militia Medic

Stealth Op
-Gas Mask

Support Op

Infiltrate Op
-Gas Mask
-Fear Gas Dispenser

Die Hard

I'm Feeling Weird

Stick to the Plan

Black Ops

Cyber Attack

Domination

Free For All

Global Offensive

Ground War

Invasion

Reinforce

A City In Fear

The addition of Bird brings more Elite options to the crew, but mainly access to a lot of Smoke. This is absolutely crippling, because Smoke in itself is really strong and when you add it to the fear bombing from Scarecrow you have an enemy crew that will either have to play super aggressive or very cagey, both of which you can adapt to and benefit from. Against most opponents you'll be able to put them on the back foot and playing on your terms, which is always something you want because it means you can play according to your own plans. 


Scarecrow (Arkham Knight)
-Secret Laboratory

Victor Zsasz

Cuchillo
-Backpack

Militia Soldier 1

Militia Soldier 2

Militia Lieutenant
-Gas Mask
-Venom Dose

Militia Medic

Stealth Op
-Venom Dose
-Gas Mask

Infiltrate Op
-Gas Mask
-Fear Gas Dispenser

Die Hard

I'm Feeling Weird

Stick to the Plan

Black Ops

Cyber Attack

Domination

Free For All

Global Offensive

Ground War

Invasion

A City In Fear

Zsasz however adds a bit of trickery to the crew with Shadowed Nightmare, is a great henchman hunter and even plays into Scarecrow wanting things to be Scared. All around Zsasz hurts crews that want to stay away from you and although you lose out a little bit in terms of number of Veterans you will still have a lot and can dictate where the opponent will have to be for most of the game, threatening them with Zsasz. Being forced to bunch up to avoid being picked off means they're more prone to Fear Master attacks and also play into the SoF deck more. 

Sunday 3 October 2021

On the Table- Kill Team Marines and Genestealer Cult

 Hi again all, over the last few weeks I've been finishing up some models I've owned for a while (and some newer) that I've had for Kill Team and with the new edition I'm keen to start playing again. 

First off was the team I bought last edition to play with, Astartes that I painted up as the Minotaurs chapter. Super easy Contrast paints over metallic basecoat for the armour, it was a look that I am happy with nonetheless and I will likely be replicating it in the future as a staple technique with large amounts of gold and bronze. Many of the Veterans I will be counting as a Deathwatch warband with the Chaplain leading, and the Chapter Master and Dreadnought I just had to finish the set of characters and if I can eventually use them later, I will. 

After these I painted up a few Genestealer Cult models so I can play both Kill Team and Necromunda, having options for both. I'm most happy that I can use them in both games as is, and I think the shenanigans I can pull with these will be a good counterbalance to the Marines as well. 

Friday 1 October 2021

Model Review- Parker Barrows, Dead Man Walking and Pearl Musgrove

 Anyone who knows me knows that this title is the thing I was most excited for from the moment it first got teased in the Malifaux Burns trailer. Parker Barrows has always been my favourite Master and keyword by far, and the blurb alone from Pearl Musgrove makes me very excited to try her out. I'll be playing around with a few other titles as they will be released before Parker (Misaki especially) but as soon as I can get the sculpts for the Barrows siblings I will be painting them and getting them on the table. 


Parker's front of card stays fairly similar to what it used to be, although he has gone down to Wp5 and 12 wounds (with Hard to Kill now though). Gunfighter and Run and Gun are still there, but he no longer ignores Friendly Fire (on his rifles at least) and loses all of the easy ways for him to get out sneaky Scheme markers while he shoots up the enemy and instead is a lot more based in counter-scheming by the way of damage. Abandon All Hope is a huge aura, and it being just a straight up swap of an enemy Scheme into a friendly is very rude because it takes the opponent's resource and gives you one instead. It also synergises great with Perdition, because it has the same range and becomes basically a guaranteed 2" Shockwave effect for 1 damage, and any damage pinging is really nice to have especially in such a big bubble. It also triggers off of all Scheme markers, so even if the opponent is placing their own to score or use their own abilities they'll be hurting for it and then you can remove them anyway with a lot of the crew's passive abilities. Drop It! (which I'll come back to later) becomes a very good means of extra damage in a lot of places while you can continue to kite the enemy from a distance. Parker's guns are a little bit different to what they used to be, although they are still very good. Still stat 5+, but with no bonuses for nearby Scheme markers although it is 14" range now for an amazing threat range. The damage is a bit more varied as 2/4/5 is now 2/3/6, and it ignores Hard to Kill which is great when it matters. As for triggers, the once per turn Crow for a double positive to damage flips (and likely meaning you'll be able to hit that 6 damage severe) is excellent, and the Ram trigger for Shielded +2 is also great to have but not something I would necessarily seek out to do. Broken Man's Lasso is really interesting because it is good range at 10", can be used on a Charge, and 6 vs Mv is a great stat, and the triggers are both excellent (Drop It! and Execute are both fantastic) but overall it is a movement controlling action on a Master that likes to be doing damage and so puts him in a bit of a different role than he normally would. It ignores Friendly Fire, and you can use it to pull friendly models out of engagement (similar to Bandit Raid, but with less immediate benefit replaced with freedom of movement) with it also choosing to give out Staggered (so if you keep dragging one thing around it becomes easier). Overall I think it's mostly going to happen where you can pull things into places you can get better shots or bunch things together to hurt them more with blasts and Scheme marker pings. Parker's bonus action is interesting, and stat 7 vs Wp at 10" range is really good, but it doesn't do a huge amount by itself unless you stack other things on top of it. Drop It! being After Resolving means it is really reliable marker dropping (and thus damage pings) but only on one model and not a massive benefit given that you're still failing a duel to do it. The triggers are both very economical too, with Masks for a free projectile action (which is either of his 2 attacks, although I think the Rifle is probably better in this case) or Crows to take the action again for more benefit as well. Both are great, and it really depends on what you're looking for in terms of board state that turn as to which one you'll want to use. His 1 tactical action moves a marker (not quite as good as removing it, but still great), and only needs a 5 to get off with a built in suit for the trigger. Moving it 4" is nice, and giving Injured +1 to enemies without it is very good especially if you can do it on Hazardous markers (which will mostly be from enemies, but it works with Rusty Alyce and especially Prospectors moving around Scheme markers). The trigger is also very useful to have, because it removes any marker moved through as well so you can quite easily clear the board between him and Mad Dog. It also removes markers that aren't Destructible so it's a little bit better than Mad Dog as well (and you can even do it on a Blown Apart marker for extra benefit). You can use this action a few times a turn to shove around markers where they benefit you and clear anything your opponent might have, and it only needing 5s is pretty worthwhile and low cost. 


Pearl Musgrove sits in the 7SS Bandit bracket where she has a lot of competition, but I think in general she has a decent place in the crew, especially with Dead Man Walking Parker. Her stats are all entirely average with even her actions all being stat 5 so she isn't amazing, but also still good enough to consider, and Gunfighter and Run and Gun are to be expected for a Bandit. Being Frontier she also has Home on the Range, but in Bandit crews you can only get 1 anyway so it's really just her being slightly further up. Hard to Kill is nice defensively, and Reformed works really nicely in a crew that already want to be removing markers pretty often (eat a Scheme to get Fast and then also heal 1? Yes please. Mad Dog blowing up Destructible markers and then healing things? Yep, also great). It does need careful control of placement, but not careful enough that you won't be getting it fairly reliably by just using her in tandem with other things in the crew. Kick Up Dust as the bonus action is to be expected for Frontier, and it can be useful to cover yourself from awkward angles of shooting but the trigger is where you will find the most synergies with Bandit and it will work in a lot of ways. It is just a really simple Scheme marker drop instead of Dust Cloud, but for only a 5 and a 3" range it's great for scoring potential but also with DMW Parker to chuck out chip damage at enemies that are placed closer together which is really nice. Draw Them In is really interesting in what it does, but I'm not certain it has amazing applications in Bandit crews like it does in Frontier. Bandit lacks the big tanky beaters that Frontier has in Reichart and especially the Sandworm, and so pulling a group of models into one of yours is likely to mean that model gets ganged up on and killed even with it coming with a heal of 2 on its trigger. Staggered gives a little bit of synergy with DMW Parker's Lasso but in general I think I would really need to consider when it becomes worth it to drag things towards one of your own models and it's usually if it can get the opponent away from somewhere they would be scoring (Ley Lines and Claim Jump mainly) or into positions where they can be blasted in higher numbers (Turf War this helps, but in general between Pearl, Mad Dog and Perdition you have lots of grouped damage). Pearl's Sawed-Off Shotgun is fairly standard in what it does, although like DMW Parker she doesn't have Drop It! which is important to point out. The damage is fairly average, although it having blasts is very nice to throw out damage, and with a positive flip and built-in Tome it works very well with what Bandits want to do. 6" range is very short, but 11" threat range with Run and Gun is still nice and the Mask trigger for Stagger works nicely with the blasts but doesn't have any other huge synergy with the crew outside of Parker's Lasso which is ok but mostly just a nice little debuff to have. Brushfire as the Tome trigger is a bit tricky to set up, but not impossible, and it adds extra blasts off of a Scheme or Dust Cloud marker within 3" of the target which is always nice. You can combo it with someone else's Drop It, and even Parker's Stare Down, to get damage from the first shot, pulse damage from the marker drop and then more damage and blasts from Pearl shooting herself. The main use I see for Pearl is to absolutely punish bubble crews with the new Parker, because you can throw out so much more damage across a few models which is really nice as an option. 

Wednesday 29 September 2021

Model Review- Misaki, Fractured and Jin Baccara

 Another one of my all time favourites with a very interesting title I like a lot, Misaki is also now corrupted by the Burning Man which is reflected in her gameplay. Moving from a Master that used to do a lot of work on her own with the ability to make her crew act as a supplement to her kit, she is now very much a support Master, but with her crew having some pretty great pieces she is definitely going to be worthwhile in the right pools. 


Misaki herself has now become an Obey Master in this form, with all that entails. Her front of card is very different to what she was before, as she is now very much non-combat, and most of her stats have gone done slightly (Df5/Wp6 compared to Df6/Wp7 of the old version, and 11 instead of 12 wounds). She does have a lot more synergy with Shadow markers in this version though, the least of which is that Shang counts as one when in her crew. She gains Shielded +1 every time a Shadow marker is placed within 8", and when Last Blossom or enemy models take actions generated from effects that aren't Charge (Obey, Onslaught, Knock Aside all count- Obeying a model to Charge still works as well) or gains Fast (Assassin) she gets to place a Shadow into base contact with them and thus also gain Shielded. This placement is only once per activation but that doesn't matter that much because it really is just free resources for doing things you would anyway with her. Wilting Tsubaki is good in itself, ignoring Concealment and then also gaining suits if models are near Shadow markers (which is great with every trigger she has) but when combined with the attack actions she has it is a really amazing part of her kit because you can make it work quite easily. Disguised also keeps her alive for longer which is nice to have, but that's about all to say about it and her front of card in general. Misaki only has one tactical action, and it's also her bonus action. It's pretty simple ignoring LoS and range, but requiring an enemy model that isn't a Master to be within 3" of a Shadow marker and for a 5 she can push the target up to 5 and make it drop a Scheme. The Mask trigger moves Misaki 3" but it is best in how it puts enemies out of position and also drops you a Scheme marker you can score off of which works great with a bunch of Schemes. Obey is the same as always (which is to say very good) and the suit built in on stat 7 is amazing, as well as it triggering her placement of Shadow markers once in her activation for a little bit extra free resources. The simple ability to make your own models take more actions (excellent for Ototo/Crime Boss charges, or moving/interacting with Torakage to let you scheme better) or against the enemy to turn their beaters against them or shove things out of position so they can't score. In general it's really great and I think it's the thing she will be doing the most. The 2 triggers though are where it really gets amazing. It's pretty obvious which one is going to be on friendly models and which is on enemies, because you want your own stuff with Focused and enemies with Injured, but you can pretty reliably make sure to get which one you want to have as well with some fairly straightforward play. Ink-Tipped Dart is fairly low damage, but stat 6 and the ability to very likely choose a suit is good enough for what is quite obviously a more support-based Master. It's Shadow marker generation (which means Shielded +1 on Misaki fairly often) and the triggers are both good too. Moment of Weakness can be a bit of fairly low-risk card cycling if you use it on your own models or more punishing on your opponent, and Shadow Pin (which you basically have built-in with Shadow markers) makes your damage better and gives a nice debuff in Staggered. Twisting Paths only works on Last Blossom or non-Master enemies (continuing the trend of this Misaki having a lot more synergy with keyword models) and they need to have Concealment as well to be able to be targeted by this action. 6 vs Wp is decent, and only needing a 5 to reach the TN is easy to do, while 8" range is pretty good to be able to mess with the board state in very relevant ways. It places the target into base contact with a Shadow marker within 8" of them so it puts things a long potential distance away from where they were earlier either to manipulate your own models placement to get where they may not have been able to otherwise, and for enemies to deny their plans or put them in places where they will be easy to kill for you. The trigger on a Tome (again, fairly easy with Wilting Tsubaki) for Last Blossom only, it instead Buries the target and you can Unbury later on in base contact with any Shadow marker on the table so you have even more range to get anywhere you want. 


Jin Baccara gets shared with English Ivan, and naturally that means Shadow Markers. He is overall fairly simple with a completely average stat line, Assassin as part of Last Blossom (but he is low min damage so don't expect it to happen in most games) and Ungentlemanly Affairs from DUA (which will be far more common, although again not as universally useful with his attacks). The other 2 abilities he has though are far more interesting and directly useful most games, with Skulker giving your crew pass tokens if he is Buried or in Concealment during the start phase (and with both keywords throwing out Shadows...) and Undercover letting him start the game buried. He can choose an enemy Minion if he is Buried when he activates (meaning this is a great potential counter to Tara and Lady J shenanigans too) and then Unbury in base contact with it before sending it back to its deployment zone and Jin himself gains Slow, which is generally a great application of the model mid-game (and you can still use some of his actions while Buried to get max value out of him). Of his 2 bonus actions both are good in the right cases, with Ambush being the usual one for free movement and Dispose of Evidence being great counter-scheming that you gain a card from at the same time. Hidden Blade at stat 5 isn't fantastic, but built in Critical Strike for 2/3/5 ignoring Armour is not bad for a cost 7 model and against Armour is one of the better ways to get damage through in Last Blossom. Ink-Tipped Dart he shares with Misaki, and here it is still competing with other very good actions but is still a great way to easily generate Shadow markers for you to use. Stat 5 is fairly average and won't be doing huge amounts, especially with 1/3/5 damage, but it's mainly the Shadow generation you want for the synergies that brings. His last action, Enemy Intel, is the main reason I like Jin because it is pretty great. He can take it while Buried, meaning the first couple of turns he can still have a meaningful effect on the game while still off the board. Stat 5 vs the enemy Leader's Willpower means there are some games that you are only really trying just cause you're Buried (when the Leader is Wp7 mostly), but in most cases you have a decent enough chance of getting it through it's worth trying anyway. The effect on it, forcing the opponent to choose either a discard or you manipulating the top 3 cards of their deck (and discarding them if you don't like the look of them- severes and the Red Joker) is really annoying to do and can mess up plans in a lot of ways. In general I think Jin will be seeing quite a lot of table time in the coming months in both his keywords, because he does so much to support their game plan