Showing posts with label MESBG. Show all posts

Friday, 20 August 2021

Model Review- Easterling Dragon Cult Acolytes

 In anticipation of (what likely is) the next book for MESBG, Forge World have released a few things over the last few months teasing the conflict between Dale/Erebor and the Easterlings. For me this means more options for my Easterling army, and I've got the new Dragon Cult Acolytes myself now so thought I'd write about how I think they work best as an addition to my original tactica.

Looking at their profiles, 11 points per model looks like it's steep and in Easterling armies cost of warriors already stacks up really fast so that can be an issue. They do have Black Dragon statlines though with Fight 4 and Courage 4, plus Unyielding Combat Stance and 2 attacks which make them look like great frontline warriors and really nasty backed up by 2 pikes. However, I would personally not advise making your entire front line Acolytes as they are only Defence 4 and very likely to be killed should they lose a fight, and still Strength 3 so not fantastic at killing things themselves either. They also lack the Phalanx special rule to protect them from being trapped by their own models, which is an issue if you play a phalanx more rigid but if you play more fluid with them (which is probably better in general with Acolytes anyway) you can easily make sure that you will have spots to retreat to should you lose, although 2 attacks backed up by 2 pikes (and possibly even a banner) should be getting you winning fights more often than not. The other big thing they have to keep in mind is Throwing Daggers, which promotes a bit more aggressive play than Easterlings traditionally play with, but it adds more potential damage output and that alone is always nice to have so I definitely rate it fairly highly. They do have a unique special rule that gives them a bonus to Jump, Climb and Leap tests making it impossible for them to roll lower results when attempting them, but that part of the rule is ultimately far more niche and the other part (ignoring In the Way when striking over barriers) is way more useful and plays into their role as linebreakers of sorts and less defensive warriors. 

In general the main thing I will be using them for is as a scalpel to apply where pressure is most needed and maximising the pike benefit there to make sure you throw 4 dice at things you don't like, which will almost always be more than the opponent will have (assuming you use them to attack other warriors, because you have fantastic duellists in your own characters). Mixing them in at a 50:50 rate or slightly less with regular sword/shield Warriors (which for me ends up being 2-3 in a warband) to waste opponents time by sitting around shielding while your more aggressive Acolytes can thin the ranks makes for a very interesting use of a loose phalanx, and although it needs a bit more finesse to use it is likely to get better results than without using Acolytes at all. 

Sunday, 19 April 2020

Men of the East Part 2- Easterling allies, Mordor and Khand

Continuing from my previous post on the Easterlings, this post is focusing on the allies options for Easterlings, primarily the Khand army list, but also a little bit of Mordor. The Easterlings do have other allies, but these are the only Historical Allies and this is the reason I will not be mentioning any others.

Khand
Army Rules
A simple bonus, Charioteers and Horsemen don't count towards the bow limit. This means that the only thing that does is Khandish Warriors, and it also lets you take 100% bows as both your main force and in an allied group for Easterlings. Given that Khandish shooting via Horsemen is somewhat useful (on Chariots it sacrifices a lot of why you're taking them) it isn't a bad option, just better in pure Khand.
I will mention the Chariot here because it is a very important part of Khand's identity, and a really good mount option. The Chariot costs 30 points for a hero, or 30 for a Warrior version, and brings some huge hard-hitting bonuses for the models riding them. It's a special mount and thus makes them a Cavalry model, but is also a 3 wound defence 7 model so is very hardy and able to soak hits for the fragile riders, plus the rider is only hit by In The Ways on a 5+ instead of 4+, which also carries over into combat as well. Models on the Chariot can still shoot after moving their full distance which is great, but more important for the heroes who come with bows as standard (but isn't really worth it for warriors). Chariot movement is quite complicated, but the most important part is that they get Monstrous Charge (so can knock down weaker Cavalry models and Monsters) and deal 2 strength 4 hits to every model they contact during a move, which happens to both mount and rider on Cavalry models (and they can continue moving if they kill these models). This bonus is huge and in conjunction with Heroic Combat from Heroes to simply fight more can lead to reaching an opponent's break point far quicker than you thought might happen. They do function a lot better with Heroic Actions though to make sure they are moving as much as possible and especially charging, but are still very good normally. 

Models
Khandish King- The Khandish King is in my opinion one of the best generic heroes in the game, and on Chariot is a ridiculously efficient combat beatstick. Although his stats aren't fantastic compared to most combat heroes he is very cheap at 95 points (125 on Chariot). Fight 5 and 3 Attacks is amazing, and Strength 4 is fairly standard for a human hero so already is doing good amounts of damage. Add in the hand-and-a-half axe for Piercing Strike and impact hits off the Chariot and models will die very quickly from the King, and that is before factoring in his Heroic Actions. The standard are good, but he has Heroic March to make the army even faster and Heroic Resolve for potential anti-magic, but the big one is Heroic Strike to keep up with bigger heroes. In a pure Khandish army it is a godsend because it lets you compete with big heroes, but allied with Easterlings you can manage because of Amdur, Khamul and Dragon Knights. Bringing along a bow and being able to move full distance with it is pretty great too, if only to get extra shots for potential damage on the way into combat where he really shines. He also has a 6" Banner effect which massively boosts up the output of the rest of the army and on himself which is great, and on a chariot have a huge distance to cover the table.

Khandish Chieftain- A King but worse in almost every sense. Courage, Defense, Attacks and Will are all 1 lower, plus they're a lower tier of hero and lose the 6" banner effect as well as Heroic Resolve and the way more important Heroic Strike so even though they're 40 points cheaper it is still worth paying this just to get multiple kings on the table if you can fit the cost in. Chieftains aren't bad Captain equivalents, the King is just better for the price difference. If you have a King in your list already I would start looking at Chieftains as a cheaper way to get more Might on the table and especially more models. 

Khandish Warrior- The basic Warrior profile of the army, they're ok but when you look at what else Khand have they kind of mostly exist as dismounts. They fold fairly quickly at D4 but they bring Fight 4 which is great, a hand-and-a-half axe (so a 2-handed axe at will for those super hits) and a kind of mediocre Courage of 3. Strength 3 is expected given their many ways at boosting wound rolls, and they have the option of becoming archers by replacing their axe with a bow, but the main use for them in my opinion is as a hard-hitting front line for Easterling Warriors as they can double up on pike support and you can Piercing Strike 2-handed without much of a downside as you still have the 2 supporting dice without a -1. Doing this you are at good odds to win a fight and even better odds to kill the enemy, and the biggest thing is you don't need to pay for Black Dragon upgrades because the Khandish Warrior is already Fight 4. It's a different type of Easterling army, and is awkward to use in Maelstrom deployment, but it does the job in most cases.

Khandish Horseman- The Warrior profile on a horse and with a bow for 5 points more, this is a very good trade. They lose either their axe or bow when dismounted but at that point they become a basic Warrior so you can't really complain much, and for 13 points they are excellent skirmish cavalry. They can become insanely good glass cannons as well through Piercing Strike and 2 handing their axe, with the only downside being if they lose the duel roll they are almost guaranteed to die but in return if they win they get +2 to wound and possible charge bonuses so they will tear through things very easily. I'd always be taking these to get into spots Chariots can't reach, and to act as objective grabbers and flankers.

Khandish Charioteer- Still the same profile as a Warrior for 30 points, but they have a Chariot. As I've mentioned above I love the Chariots because of how hard-hitting they are in combat, and the warrior versions are great to fit more into a list. I would always take a couple to buff out ranks when you are taking Khandish models because they really are amazing value. Everything I love about Horsemen plus impact hits and extra protection, although like Warriors they have to choose between bow and axe. They're ok bow platforms because they can still fire after moving their full distance, but that's not a major thing and they're far better as heavy linebreakers leaving the Horsemen to skirmish shooting. 

Example Lists
Below are a couple of examples of Easterling lists with Khand allies, and a single example of a pure Khandish list that I would play. Both lists are 750 points to show the best examples of how I would play Khandish models in large games, and because this is the level that I play.

Easterling/Khand
Khandish King
-Chariot
Warband
2 Khandish Charioteers
5 Khandish Horsemen
8 Khandish Warriors

Amdur, Lord of Blades
-Armoured Horse
Warband
10 Easterling Warriors
-Pike
-Shield
4 Easterling Warriors
-Shield

Easterling War Priest
-Armoured Horse
Warband
6 Easterling Warriors
-Pike
-Shield
4 Easterling Warriors
-Shield

This list is based around having a hard-hitting core infantry block, which has a mix of Easterling and Khandish Warriors on the frontline so you can put either higher damage output or durability where you need to. It has one pike for each frontline warrior which lets you spread wide and support everyone or to pick the fights you want to win and double rank there (especially useful when you’re going all out on the Khandish Warriors). It has 2 great combat heroes and magic to support your lines (although it won’t affect the Khandish) and plenty of harassment from the Horsemen before lines clash. When they do you have 3 Chariots on the table to smash through enemies and open up holes in their lines to exploit, plus all the previously mentioned tricks (and 2 separate banner effects on your characters, although they only affect one part of the army) 

Pure Khandish
Khandish King
-Chariot
Warband
2 Charioteers
9 Horsemen

Khandish Chieftain
-Chariot
Warband
2 Charioteers
6 Horsemen

Khandish Chieftain
-Chariot
Warband
2 Charioteers
6 Horsemen

This list is basically Mongolian Rohan in how it plays, being a skirmish force that can then hit really hard in combat. With 9 Chariots in the army and the rest cavalry it really wants to be charging but when it does it will lead to very reliable deaths on the opponent’s side as long as you manage to win fights. You have a ton of decent shooting with the Horsemen as well, and everything having hand-and-a-half axes means you have a lot of versatility about how much damage you want to pull off at the expense of your own potential survivability. In general it seems to be a really fun army at the least because it is super-fast and hard-hitting, but it is made out of glass and can’t take a hit back.

Mordor
Army Rules
The Mordor army rules are quite good on their own, but as allies aren't as beneficial. When you have more models on the board than your opponent, all your Mordor Warriors can reroll 1s to wound and get +1 courage. If you're using Shamans for Fury the courage doesn't really matter (other than Blades of the Dead) but otherwise is pretty good with their mostly terrible courage, but the rerolls of 1s is the best part for Easterlings taking them as allies. Mordor is being allied in to get models that can more easily wound, and rerolling 1s goes a long way to fixing that problem and having reliable damage to smash through enemy lines. 

Models
The Mordor roster is incredibly large and I won't be talking about it all here, rather the warrior options that I think are somewhat useful and/or interesting when allied with Easterlings. The captain equivalents of these models are all well worth consideration to actually lead them, as are the Orc Shaman models (Shamans and Kardush) or just Khamul.

Morannon Orcs, Mordor Uruk-Hai and Black Guard of Barad-Dur- In my opinion the 3 tiers of orc for allying to Easterlings, they all bring a few things to the table. First off is high strength, with them all having minimum Strength 4 and Black Guard having the insanely good Strength 5 (although without paying extra on top of their already high cost are stuck with swords) so they have the advantage above Easterling Warriors there and really this is why you want them. Morannon Orcs are Fight 3 so still tend to want Black Dragon support, but the others are fairly self-sufficient at Fight 4 so you can cut costs on Black Dragon upgrades. Uruk-Hai are fairly low Defence but they can take shields to get to Defence 5, the others being able to get to 6 with their shields (which Black Guard have as standard). Morannon Orcs have choices of sword, mace or axe while Uruks can take bows or two-handed maces (the made being the better option, although they are 4+ shoot the shooting isn't great and I'd take Khandish for that angle) with all of them being able to take banners (although I would go for a Kataphrakt banner still for the mobility). Overall Black Guard are by far the best option here, but on a budget any of them can do great work.

Black Numenoreans- These are the best of the best when it comes to Evil Man Warriors IMO, because for their cost they bring so much to the table. They don't have the higher strength of the Orcs but they do have good Defence, higher Courage and Fight 4 so they are great in a fight (especially when backed up by pikes). They lean into the defensive nature of Easterlings as well with Terror, so you can sit comfortably once you're in position and then wait for the opponent to come to you, which will be tough for them to achieve if they're failing Terror rolls and then you roll 3 dice against them.

Morgul Knights- Basically mounted Black Numenoreans, the Morgul Knights also come with lances so are really amazing (although very expensive at 18 points a pop) shock cavalry. They don't get the army bonus, but they can still smash through enemy lines with no issues against all but the toughest targets and themselves can take a decent beating.

Mordor Troll (and Chieftain)- Evil are known for having a lot of monsters, and the Troll is one of the easier ones to put in with Easterlings and maintain theme (a Dragon being more themed, but losing your army bonus). Fight 7, great Strength and Defence plus high attacks and wounds the troll is something to fear (of course they have Terror) and a great way to have extra linebreakers in your list and things to just smash up enemies. The Chieftain adds to this by being a hero with his own Might, Will and Fate, although he replaces the option of weaponry for a sword and +1 defence. He also has Heroic Strike which makes him quite a strong opponent and a really great choice for Easterling armies as an ally even if just by himself.


Example Lists
I won't be putting lists here with every single option above, but I will put a couple of alternate options to show how I would use some specific things.

The Fallen Men
Black Numenorean Marshal
-Armoured Horse
-Lance
Warband
8 Black Numenoreans
4 Morgul Knights

Amdur, Lord of Blades
-Armoured Horse
Warband
8 Easterling Warriors
-Pike
-Shield
2 Easterling Warriors
-Shield
Easterling Kataphrakt
-Banner
Easterling Kataphrakt
-War Drum
2 Easterling Kataphrakts

Easterling War Priest
-Armoured Horse
Warband
2 Easterling Kataphrakts
6 Easterling Warriors
-Pike
-Shield
4 Easterling Warriors
-Shield
This list is very similar to the Easterling/Khand list above, but it trades Chariots for lance cavalry and the more reliable damage of Khandish Warriors for the hardiness of Black Numenoreans. Overall it's a straightforward list and a bit less outright damage but it has some tricks as well with mixing ranks and holding your battle line where you need it through Terror and the simple toughness of the troops. 

Sauron's Elite
Troll Chieftain
Warband
8 Black Guard of Barad-dur
2 Morannon Orcs
-Shield

Khamul the Easterling
-Fell Beast
Warband
Easterling Kataphrakt
-Banner
Easterling Kataphrakt
War Drum
10 Easterling Warriors
-Pike
-Shield

Easterling War Priest
-Armoured Horse
Warband
10 Easterling Warriors
-Pike
-Shield
This list is a bit different to the others in that it uses Khamul and is more focused on the magic, but it has a very tough wall at the front of it and a really great combat hero in the Troll Chieftain. The list is a little light on Might and Fate but you can make up for it with Magic and just in general reliable fights. Plus, who doesn't like the idea of a gleaming golden-armoured troll?

Sunday, 1 March 2020

Men of the East- Middle-earth Easterlings Tactica

For what is the last of my current Middle-earth tacticas I'm now covering the last of the armies I own and play- the Easterlings. The gleaming horde aren't the strongest army around but they certainly are nice looking and fun to play with a very unique playstyle sitting somewhere in between Gondor and Isengard without the shooting strengths of either army. They're also unique in Evil in that their magic outside of standard Nazgul magic is entirely buff-based and can turn the targets into killing machines.


Army Rules
The regular army rules for the Easterlings are interesting and slightly disappointing in that none of them trigger until the game is as good as over. Your Easterling models get +1 to their courage after they break meaning they're harder to run away and also more likely to pass Terror once they're broken. Ideally you won't break and can't benefit from this (and with Easterling special rules they're hopefully surviving easier) but they do also always get to choose to reroll the dice to end a game once per game should it end sooner than they want. This has recently been errataed to only work if 25% of the army is from the Easterling list (something which was a bit of an odd decision IMO but obviously necessary) although if you're playing themed lists this is likely to have not been an issue anyway.

Models
Khamul the Easterling- Like all the other armies of the Fallen Realms the Easterlings get a named Nazgul, but with the special fact that Khamul is one of only 2 wraiths to have been a character from the books (alongside the Witch-King). Although his stats are the same as the majority of the named Nazgul, except for his lower end Will as a combat wraith, he has some great rules to help him out with what he wants to be doing. Although he has none of the Easterling standard rules, he does have Harbinger of Evil, Terror and Will of Evil like the other Nazgul which makes him harder to charge but at the penalty of his own Will points if he is involved in fights and once he loses all 12 Will he dies. He does however have Essence Leech which regains his Will for every wound he deals and lets him spend a point of Will to increase his Attacks, Fight or Strength by 1 but cannot be used on mount stats. This is only relevant on the Fell Beast (as only the Fell Beast's strength is higher than any of Khamul's stats) but in any case is still useful because it can get him up to Fight 6 or 2 attacks before charge bonuses or Heroic Strike (which he does also have). The best method of using him in his best build is on a Fell Beast (as opposed to with armour or either kind of horse) because it gives him increased movement, Fly and access to monster special attacks plus the Fell Beast's Strength of 6 in addition to Essence Leech. Even if he does lose a fight he is still difficult to wound at Defence 8, and also has some good magic to mess with an opponent even if it is a lot less reliable than other Nazgul. His best spells are Transfix (on a 4+) and Compel (on a 5+) but his spells tend to be on the harder side to cast compared to his fellow ringwraiths and some of them are just not worth casting (Black Dart especially) or very situational. Because of this I would use his magic sparingly in situations it wins you fights quite easily and will get you Will points back anyway. Last thing of note is that he has Heroic Channeling (obviously for his magic) and Heroic Challenge which can come in handy when they need to. 

Amdur, The Lord of Blades- The un-subtle named hero of the list, Amdur is a pure combat beatstick through and through. He has a very good heroic statline but the most important ones are his Fight 6, 3 attacks and 3 wounds so he is a pretty great combat model. Otherwise he has fairly standard rules for an Easterling in Phalanx and Gleaming Horde, plus Unyielding Combat Stance to ignore being Knocked Down on a 4+ (not always relevant but still really nice) and Blood and Glory to regain Might when he kills heroes which is really nice considering he has a great package to win fights. Fight 6 and 3 attacks is just the start, but his weapon is also Elven-Made to help him win draws and he is counted as a banner for all Easterling models (including himself) so he will always benefit from the reroll in duels, and he has the always-good Heroic Strike and Heroic Challenge for more niche situations. In addition, if enemies declare Heroic Strike against him, he may also immediately declare it without spending Might meaning he can get a certain degree more versatility in fighting enemy heroes. As this is his main role, he gets the extra bonus of not only regaining Might if he kills the enemy leader via Blood and Glory but he also gets to increase the range of his banner effect to 6” which is a huge bonus to the army. He is best used on a horse for obvious reasons (extra damage and increased banner effect from bigger base) but otherwise he is a really great option to take in your army.

Easterling Captain- The baseline hero of an Easterling army, they are also the cheapest heroes available at 50 points. They come with a hand and a half axe (great because it's one of the few easy ways to crack armour in Easterlings) and heavy armour, plus the Phalanx and Gleaming Horde rules which I will discuss more below with the Warriors and Kataphrakts. Their armoured horse upgrade comes with losing the glaive and replacing it with a sword so is a loss in reliability for mount bonuses, but still worth taking. The shield upgrade makes them D7, possibly 8 mounted and as such is somewhat useful, but the 5 point bow isn't so great. Their stats are fine for a Captain and won't disappoint for their cost, but they're mainly a cheap way to bring in good amounts of troops and get access to Heroic March.

Easterling Dragon Knight- A generic combat hero, Dragon Knights are really efficient blenders for their cost. In effect Captains that replace access to troops and March for pure combat power, the Dragon Knights also have a big downside in that they are Minor Heroes and can only have warbands of Black Dragons so require heavy investment to take regular warbands outside of them. That said they are very good fighters for their cost with Fight 5, Heroic Strike and 2 Might (although they also have no Will or Fate so are prone to being one shot or shut down by magic) while packing Blood and Glory and Unyielding Combat Stance like Amdur with all that entails. They can benefit from the Shielding rule even without shields, but with 3 attacks and a decent fight value they probably won't need it too much. They pay a premium for an armoured horse at 15 points, but it makes them so much better so it is something I would almost always take. 

Easterling War Priest- These are the heroes I would never leave home without. Although the mounted model is incredibly rare and expensive, for 75 points as a Hero of Fortitude you get good value out of it already. Unlike Captains or Dragon Knights getting bonus attacks and defence, they are basically 2 wound Warriors with 1 Might, 1 Fate and 3 Will. Their only Heroic Action is Channeling which obviously leads into their magic, and their role to either buff the army around him to pass all courage tests (Fury on 3+, or the channelled version for an extra save) or to pick one specific model and give them a great strength boost (Bladewrath on a 2+). The Easterling Battle Stave carried by War Priests are pretty great weapons too counting as your choice of either a spear or a two-handed axe which like the Captain lets you pierce armour if you need to (not that you should with a War Priest). Their biggest downside is not having Shieldwall or Phalanx which means they are more vulnerable than the rest of the army but as a backline support caster that isn't huge anyway as they won't be wanting to be on the front lines. 

Easterling Warrior- the army’s core, Easterling Warriors are based solely around being the most efficient pike block in the game (that isn’t to say most consistent, that belongs to Uruks). They have the Phalanx rule which lets them benefit from both shield and pike which is excellent, and they also back away in 3 ranks instead of 2 which means you can double support and not get trapped. These together mean Warriors should pretty much always be running in 3-deep formations (I prefer sword/shield, pike/shield, Black Dragon/pike/shield as my ranks) and it looks really good on the table too. They have fairly average stats overall (they’re basically evil WoMT and Fight 3 especially hurts) but they can benefit from a lot of buffs across the army particularly from War Priests, banners and drums.
Easterling Kataphrakt- The cavalry option for Easterlings, they have a few quite amusing tricks but ultimately are very low output when it comes to damage. The same statline as a Warrior with shield but mounted (including Phalanx which really only helps them backing away) plus they get a horse and the Gleaming Horde rule for 6 points extra (1 for Gleaming Horde, 5 for horse). Gleaming Horde is a pretty neat rule because it gives them the bonuses of Shieldwall while mounted and it affects the horse too which is a great way to protect them from shooting, plus it even benefits heroes with Gleaming Horde while they don't have shields. It means you very often if not always want to run a couple Kataphrakts at minimum just to give Shieldwall to your mounted heroes for the added protection it gives. Their stats are not great for shock cavalry and as such are much better used for flanking forces or objective grabbers, as with their stats they will not reliably be wounding much even if they win fights and get knock down bonuses. They do have great wargear options though in the War Drum and Banner which are great support pieces I would never go without in armies 500 points or higher (although from about 500-700 the Banner isn't mandatory if you run Amdur). The drum gives you options for some insanely high movement speeds in the army (just not charging) as with a Heroic March you can hit up to 20" movements on the Kataphrakts, 11" on the foot troops and 22" on Khamul if he is on his Fell Beast. The ability to completely dictate engagement from this is a really good boost to the army for pretty cheap. 

Black Dragon upgrade- both Warriors and Kataphrakts can take this upgrade, which for 2 points per model gives them +1 to their fight and courage values. The courage bonus is largely irrelevant given the other bonuses Easterlings have, and 2PPM is expensive for +1 fight, but in the pike block it does the job well. Think of it like a bow where you only need to give it to 1/3 of the formation, but everyone can benefit and the Black Dragon can sit safely at the back giving his benefits. On Kataphrakts it’s a bit different because there’s no support, but it’s still a decent option to get around their fight 3 and attempt to mitigate their weaknesses on the combat front (average fight and strength). 


Example Lists
In all of the examples at every points level below I will mention an Amdur option and a Khamul option, as I think the 2 shouldn't be seen together until at least 600-700 points, and then at 750 a list with Amdur only and a list with both. I don't think either option is necessarily better than the other because they both bring very good things to the table, but they do require very different uses

400
Amdur
Amdur, Lord of Blades
-Armoured Horse
Warband
5 Easterling Warriors
-Shield
4 Easterling Warriors
-Shield
-Pike
4 Easterling Warriors
-Shield
-Pike
-Black Dragon

Easterling War Priest
-Armoured Horse
Warband
2 Easterling Warriors
-Shield
2 Easterling Warriors
-Shield
-Pike
2 Easterling Warriors
-Shield
-Pike
-Black Dragon
This list is a fairly no-nonsense pike block with Amdur as a beatstick and the War Priest for support. Simple, effective combat list that at this points level you don't necessarily have the big weaknesses of the Easterlings in wounding models (as there won't be a huge amount of higher defence models so you can probably just out-dice them) 

Khamul
Khamul the Easterling
-Armoured Horse
Warband
4 Easterling Warriors
-Shield
4 Easterling Warriors
-Shield
-Pike
3 Easterling Warriors
-Shield
-Pike
-Black Dragon
Easterling Warrior
-Banner
-Shield

Easterling War Priest
-Armoured Horse
Warband
2 Easterling Warriors
-Shield
2 Easterling Warriors
-Shield
-Pike
2 Easterling Warriors
-Shield
-Pike
-Black Dragon
Same as the last list, but with Khamul so you have magic control and shutdown instead of all out fighting. Everything still works the same otherwise, just with more magic to hit the opponent with to shut off any bigger hero that they have until you can deal with them.  

500
Amdur
Amdur, Lord of Blades
-Armoured Horse
Warband
4 Easterling Warriors
-Shield
5 Easterling Warriors
-Shield
-Pike
3 Easterling Warriors
-Shield
-Pike
-Black Dragon
Easterling Kataphrakt
-War Drum
2 Easterling Kataphrakts

Easterling War Priest
-Armoured Horse
Warband
4 Easterling Warriors
-Shield
4 Easterling Warriors
-Shield
-Pike
4 Easterling Warriors
-Shield
-Pike

Same idea as the 400 point list, just using the extra points to fill warbands out. It has a bit more cavalry and a War Drum to go with the phalanx this time so it can be a bit more all-rounded in its approach.
Khamul
Khamul the Easterling
-Fell Beast
Warband
4 Easterling Warriors
-Shield
3 Easterling Warriors
-Shield
-Pike
5 Easterling Warriors
-Shield
-Pike
-Black Dragon
Easterling Kataphrakt
-War Drum
Easterling Kataphrakt
-Banner

Easterling War Priest
-Armoured Horse
Warband
3 Easterling Warriors
-Shield
3 Easterling Warriors
-Shield
-Pike
2 Easterling Warriors
-Shield
-Pike

-Black Dragon
Like all the other point levels taking Khamul over Amdur hits the model count, but in this case you have a magic using hero that is a decent fighter and also on a Fell Beast backed up by some fairly consistent troops and a great support hero.

 600
Amdur
Amdur, Lord of Blades
-Armoured Horse
Warband
4 Easterling Warriors
-Shield
3 Easterling Warriors
-Shield
-Pike
3 Easterling Warriors
-Shield
-Pike
-Black Dragon
Easterling Kataphrakt
-War Drum
2 Easterling Kataphrakts

Easterling War Priest
-Armoured Horse
Warband
2 Easterling Warriors
-Shield
2 Easterling Warriors
-Shield
-Pike
2 Easterling Warriors
-Shield
-Pike

Easterling Captain
-Armoured Horse and Sword
Warband
3 Easterling Warriors
-Shield
3 Easterling Warriors
-Shield
-Pike
3 Easterling Warriors
-Shield
-Pike
-Black Dragon
2 Easterling Kataphrakts
Adding in an extra warband over the 500 point list, this one again does the same job just with a Captain. The potential for Heroic March+War Drum combos as well lets you move very quickly up the table and threaten objectives a lot sooner so you can dictate your terms to the opponent. 


Khamul
Khamul the Easterling
-Fell Beast
Warband
4 Easterling Warriors
-Shield
4 Easterling Warriors
-Shield
-Pike
5 Easterling Warriors
-Shield
-Pike
-Black Dragon
Easterling Kataphrakt
-War Drum
Easterling Kataphrakt
-Banner

Easterling War Priest
-Armoured Horse
Warband
3 Easterling Warriors
-Shield
3 Easterling Warriors
-Shield
-Pike
3 Easterling Warriors
-Shield
-Pike
-Black Dragon

Easterling Dragon Knight
-Armoured Horse

Only slightly changing the 500 point list, this focuses on increasing the model count in your warbands and then adding a good mounted combat hero in the Dragon Knight to help you fight out other enemy heroes where needed (especially with Bladewrath). It’s a grinder list that focuses on heroes, but that’s almost any Easterling list. 

750
Amdur
Amdur, Lord of Blades
-Armoured Horse
Warband
3 Easterling Warriors
-Shield
3 Easterling Warriors
-Shield
-Pike
3 Easterling Warriors
-Shield
-Pike
-Black Dragon
Easterling Kataphrakt
-War Drum
Easterling Kataphrakt
-Banner
4 Easterling Kataphrakts

Easterling Captain
-Armoured Horse and Sword
Warband
2 Easterling Kataphrakts
3 Easterling Warriors
-Shield
3 Easterling Warriors
-Shield
-Pike
2 Easterling Warriors
-Shield
-Pike
-Black Dragon

Easterling Captain
-Armoured Horse and Sword
Warband
2 Easterling Kataphrakts
3 Easterling Warriors
-Shield
3 Easterling Warriors
-Shield
-Pike
2 Easterling Warriors
-Shield
-Pike
-Black Dragon

Easterling War Priest
-Armoured Horse
Other than the magic from the Priest this list can be handwaved as a fairly historical list which is great fun, and using historical tactics in it is the way to go. It's a fairly good pike block led by some great combat models and it has good support (2 banners and the Priest) so you should be able to get work done with it even with their traditional lack of armour piercing. It all moves very quickly, so put it up to objectives before your opponent and play the defence game. 

Khamul
Amdur, Lord of Blades
-Armoured Horse
Warband
4 Easterling Warriors
-Shield
3 Easterling Warriors
-Shield
-Pike
3 Easterling Warriors
-Shield
-Pike
-Black Dragon
Easterling Kataphrakt
-War Drum
4 Easterling Kataphrakts

Easterling War Priest
-Armoured Horse
Warband
2 Easterling Warriors
-Shield
2 Easterling Warriors
-Shield
-Pike
2 Easterling Warriors
-Shield
-Pike
-Black Dragon

Khamul the Easterling
-Fell Beast
Warband
4 Easterling Warriors
-Shield
3 Easterling Warriors
-Shield
-Pike
3 Easterling Warriors
-Shield
-Pike
-Black Dragon
Easterling Warrior
-Banner
-Shield
Like all the other list variations, lowering the model count for Khamul adds some offensive magic at the expense of versatility through Captains and the extra models. This list does bring the Fell Beast though to make Khamul a real threat and alongside Amdur can take out any high level hero between them. The other 750 point list is overall a lot better, but getting in Khamul with your pike blocks and Amdur is still a good thing. 

Friday, 6 December 2019

War in Rohan- Legendary Legion First Thoughts

Welcome back everyone, with a bit of a surprise to me in that I’m talking about the Legendary Legions from War in Rohan a week before release! Quite surprisingly the latest article on WarhammerCommunity covering the book has 7 Legendary Legion pages that are able to be read (although it is somewhat blurry and a lot of squinting is involved!) and we can gather some information on how the lists will function as a result of this.

Rohan
Obviously given the title of the book Rohan gets the most Legendary Legions here, with 4 of the 7 we’ve seen covering different points in the book. The intention seems to be in making lists that are fluffy yet still viable (like all the other LL lists) and not to have super-competitive lists that are just amazing.

Theodred’s Guard
 The long-awaited Fords of Isen list, this is based around the initial conflicts of the War in Rohan, the Burning of the Westfold and Theodred’s death. This list is unique for Rohan’s many Legendary Legions in that it has a combined arms focus and isn’t locked into pure cavalry or pure infantry, and instead gives benefits to both depending on what they are doing. Theodred has to be taken as the army’s leader obviously, but otherwise there are no restrictions (including Riders of Rohan counting towards the bow limit in this list, likely to force taking Warriors to reinforce the theme). It has access to Elfhelm and Grimbold as the other named heroes both with their regular options (horse for Elfhelm, Helmingas upgrade for Grimbold’s troops) and all the generic Rohan warrior options plus Captains.
Protect the Prince- All models in the force gain Sworn Protector (Theodred) which is a nice bonus, and it also affects Theodred himself which is really great to have against armies that cause Terror.
Riders of Theodred- In effect it’s replacing the benefits of being near Theoden for Rohan Captains, Riders and Royal Guard with being near Theodred. It’s great in that it heavily pushes Theodred as the lynchpin of the army as it should and gives the army some nice bonuses in their ability while keeping it quite elegant in terms of rules text.
Fight in Ranks!- A really nice boost to foot Rohan, this lets Warriors armed with Throwing Spears use them as regular spears to support provided they didn’t throw them that turn. It’s a great way to promote a lesser-seen Rohan build and pretty good in general as it increases versatility in the army. 
All in all this is a really nice thematic list that I like a lot and has a lot of strong options. Elfhelm and Grimbold are both great budget heroes that can dish out a lot of hurt, and Theodred is a good lynchpin for the army as well with his damage output. It does have to be careful against higher tier heroes and magic, but it’s a good enough list that it isn’t just auto-losing when Azog hits the table. 

Defenders of Helm’s Deep
The movie-based LL of the Helm’s Deep siege, with Rohan and Haldir’s Galadhrim unified by the Three Hunters. This force is a purely foot-based Rohan list and as such no models have options for mounts, and options are somewhat more restricted. It can take Galadhrim models, but they can only be a maximum of 33% of the army, and Theoden has to lead the force and must wear heavy armour. The only major restriction of wargear in this list other than no horses is Aragorn, who has to take his armour but otherwise gets no other options as this is movie-based and Aragorn didn’t have Anduril yet.
Fight in Ranks!- Same as in Theodred’s list, it lets Warriors armed with Throwing Spears use them as regular spears to support provided they didn’t throw them that turn. Just as good here as it is there if you’re using it for a Theoden-focused foot Rohan, but Galadhrim spears are more useful in terms of actually supporting because then you’re getting their great fight values added as well as just extra dice.
Give Them A Volley- If any bow-armed model (including elf bow) doesn’t move they get to increase their shooting range to 30”. This is great on the named Elven heroes because they not only get extra range, they’re accurate (Legolas using his single shot) or making multiple shots so it’s just more value. It also works well with Aldor’s shooting but the elf options are usually better
Fall Back to the Keep!- Similar to the Easterling army bonus in that they get +1 courage when broken (but here only warriors), but they get a reroll to courage tests if near Theoden once broken instead of choosing when the game ends. Great fluffy rules here to represent the stubborn defence of Helm’s Deep even in the face of failure, and even though the courage bonus is only useful against Terror (because if Theoden is passing break tests Stand Fast! Kicks in, if he fails he isn’t there any more) it’s still there.
I would personally recommend having a contingent of Lothlorien elves present in the army purely for bow fire, and for this reason I would make sure every one of them has bows (the limit to elves is the same as the bow limit and they’re better shots than the Rohirrim so they’re the better option. Giving them spears is also useful so they can shoot through the front line and then add support later. Haleth is also naturally a must have for the army to get the fight bonuses, and Aragorn with this bonus becomes a complete monster even without Anduril to get the wound bonuses. 


Riders of Eomer
The relief force that comes to break the siege of Helm’s Deep, this force is another all-mounted Rohan army with relatively few options, instead making up for it by those options being useful. Eomer must lead, which makes sense given the army title, and otherwise the only options are Erkenbrand, Gandalf the White, Captains of Rohan and Riders of Rohan.
To the King!- All Rohan Cavalry models (every option but Gandalf that is) gains +1 strength on the charge provided they are within 12” of Eomer (which is fairly easy)
Look to the Sun- Once per game Gandalf can declare that all enemy models that were charged by friendly cavalry that turn are at -1 to their duel rolls, massively increasing the chances of winning fights (and then the bonus from Eomer gives bonuses to wound).
This army is pretty simple but good at it’s job of being a hard-hitting cavalry army based around 2 great heroes, and I would almost always take Gandalf above 500 points as he benefits the army in a lot of ways. Erkenbrand is also a very good option that plays into the strengths of the army, as his Redshields will mean the army is even more reliable having a banner effect while not having to pay anywhere near the points of a banner (although I would still take a regular Rider with a banner just to spread the effect around and especially to hit Eomer) and his Horn of the Hammerhand will benefit the army a lot against Terror-causing foes

Paths of the Druadan
This one represents the Rohirrim on their ride to Gondor and the skirmishing in the Druadan Forest alongside the Woses Warriors that reside there. Because of this the list must take both Theoden (who has to be the leader like the other forces he appears in) and Ghan-buri-Ghan (who must take his full warband of Woses Warriors). All Rohan models have to take horses and other than the Woses and Rohan Outriders they get all the same options as the Riders of Theoden list from Gondor at War, although the very strong bonuses of that list are replaced with different ones to reflect the different events.
The models in this list do not benefit from any of their regular army bonuses (other than Riders of Rohan not counting to bow limits) and instead gain the following.
Know All Paths- The biggest bonus of the list in my opinion, it affects how easy it is for your army to win simultaneous Heroic Moves. It effectively gives a bonus to the roll (3 or less becomes 4 or less, 4+ becomes 3+) so you can be far more reliable in your manoeuvring and make sure your own cavalry charges are successful when it has the biggest impact.
Waypoints- The player of this army gets 3 25mm markers that go anywhere on the table before deployment, and Rohan Cavalry within 6” of them ignore the negative effects of moving or charging through Difficult Terrain. It’s good to have, especially on terrain-heavy tables, but overall isn’t going to win or lose games by itself.
Kill Orc-folk- This one is simple and quite good, all models in this list reroll 1s to wound against Orcs, Uruk-Hai and Goblins. It helps reliability and it does the job when it works, but it isn’t a huge loss when the opponent doesn’t have any of them.
This army in my opinion is something that won’t be seen at tournaments or large events outside of novelty lists for a couple of reasons, but it is a really nice thematic army that does exactly what it should. It’s not as outright strong as any of the “named” Rohan lists (those being Theoden, Eomer and Theodred) and Woses Warriors aren’t exactly a popular army to begin with, but for someone who wants to play both this is definitely something to consider.

Isengard
Unlike Gondor at War the conflict in this book is largely between two sides, with Isengard making up the Evil side. As such they get 3 Legendary Legions (that we know of- one for Dunland is still possible) each for a different part of the Isengard war machine.


Ugluk’s Scouts
This Legendary Legion reflects the point in the movies and books where Pippin and Merry are taken hostage by a group of Uruk-Hai and Orcs, and the debate between them that ensues while they are supposed to be working together for Saruman (before quickly getting slaughtered by Eomer’s men). It’s a scout army and as such lacks the pikes and crossbows that Uruk-Hai Warriors bring (as well as Vrasku and Lurtz) but still has some great options in the list. Ugluk has to be the leader given the name, and only Orc heroes can lead Orc models while only Uruk heroes can lead Uruk models. It has Ugluk, Mauhur, Grishnakh and the new Snaga as named options, Uruk Scout Captains, Uruk Drummers and Orc Captains as generic heroes and Uruk Scouts and Orc Warriors as the Warrior options. All of these keep their standard options from the regular lists except for no Warg on the Orc Captain (Wargs go in the Wolves list not here!)
Their Pace Has Quickened- If Mauhur is in the army (which he should be) all Uruk Scouts can get his Marauders bonus (for move 8”) and don’t pay for it. In addition Ugluk, Uruk Drummers and Uruk Scout Captains always get the 8” movement which is in itself a great bonus and makes the army super fast.
Make Haste to Isengard- giving the army Woodland Creature, it’s just a part of the army bonus that extends to the Orcs present. It’s good to have and in an army that is already quicker than normal it comes in handy very often which is terrifying.
Animosity- Something originally seen in the Cirith Ungol list for Battle Companies, this gives all Orcs a +1 to wound if they’re in the same fight as an Uruk, and vice versa. It’s nice to have but not always going to happen, so make sure if you’re in fights you want to get kills in to pack in an Orc and an Uruk.
I’ll start first by saying this LL has the definite issue of us not knowing what Snaga does, so no one can fully judge the value of the army as a whole quite yet. That said, Mauhur and Ugluk are both excellent and make Uruks in the force very good, and with that said the Scouts are well worth taking here. Grishnakh and the Orcs are less useful but noticeably cheaper and as such have a use in both bumping up the model count and in triggering Animosity for easier wounding.


Wolves of Isengard
Isengard’s answer to the all-mounted Rohirrim, this list is purely based around Warg Riders. Every model in the list has to be mounted on a Warg (or is a Warg) but otherwise they have their standard options. Sharku gets bumped to a Hero of Valour and must be taken as the army’s leader, and the other options for heroes are Orc Captains and Shamans who gain the Isengard keyword (and the Shaman changes Fury to benefit Isengard Orcs). The only warriors they get are Warg Riders and Wild Wargs but these are both effective enough in their roles that they don’t need more (and these are what fits the theme of the army)
Leader of the Pack- Sharku always has the option of declaring Heroic Combat for free. The saving in might is great to have and should he be against weaker chaff he can potentially chew through them and push the opponent to break point quicker which is always helpful.
Ambush- In scenarios with Maelstrom deployment they can choose who wins first turn (unless the opponent also does that in which case it’s regular rolls) and they can charge the turn they deploy off the board edge, with the added rule that if they would take a Terror test and fail they still move on, but cannot charge.

Scouts- Probably the jankiest rule in the whole book, it allows d6 models to move after deployment and if able they can also shoot. They can’t end within 3” of an enemy or charge, but they can also use this movement in Maelstrom of Battle deployments or as Reinforcements to come onto the board before they would normally be allowed, each being treated as its own warband and re-rolling results that prevent them from arriving (but not ones that let the enemy place them which is important)

In such a simple list there isn’t much to say about list building other than you probably want to have a Shaman in somewhere to get around Terror. Other than that, a good mix of shields, throwing spears and bows is nice and banners are always useful, but you’ve got a cavalry force at strength 4 with access to cheap Warg fodder to grab objectives when they need to. It’s basic but it should work well enough given the bonuses, which is all you can really ask for.

Assault Upon Helm’s Deep
The attacker list for the siege, this is pretty simple in that it has no named characters and you just get Uruk Captains, Shamans, Warriors, Berserkers and Demolition Team plus the Isengard Siege Ballistae and Trolls. You have to take an Uruk Captain as your leader but that was likely to happen anyway because taking an army of Shamans leading isn’t very effective as after the first one their value diminishes.
“You do not know Pain, you do not know Fear!”- Half of the regular Isengard army bonus (the other half going to Ugluk’s Scouts) this means Isengard models don’t take break tests until 66% of the army is dead. That’s the entire list here so stops things running away more which is great
Commander of the Uruk-Hai- The Captain leading the army gets bumped to 3 attacks and 3 wounds, which is helpful when your army leader isn’t a powerhouse hero. It helps him win fights and survive if he does lose, which are both useful given his Captain stats.
The Isengard Hordes- Every hero’s max warband size is increased by 6 models, which lets you pack out a horde of Uruks a lot easier without having to buy as many heroes to lead. In a list that is geared towards taking troops this is very good to have and is a really nice bonus
Break the Walls- The siege-based rules for the army, Ballistae can reroll hits and scatter rolls they make which helps them a lot and can make them very annoying to face (but they’re still no Iron Hills Ballista) and the demolition charges in your army can roll 2 dice instead of 1 when detonated and pick the highest, meaning they will be doing as much damage as possible and making them somewhat worthwhile.
When I would build this army I would lean towards making sure I have a lot of bases covered while also keeping more of the army bonuses. This means I would take as many Uruks as I can pack in at lower levels and have crossbows for strong shooting, berserkers and pikes scattered into the rest to make up a strong fighting line. At higher levels this idea is much the same with the basic troops, but I would consider a troll or a ballista to add some bigger punch against higher tier heroes as they will cut through the army somewhat more easily given the lack of anything but Captains and Shamans.

Wednesday, 27 November 2019

The Army of the Dead- Middle-earth Tactica

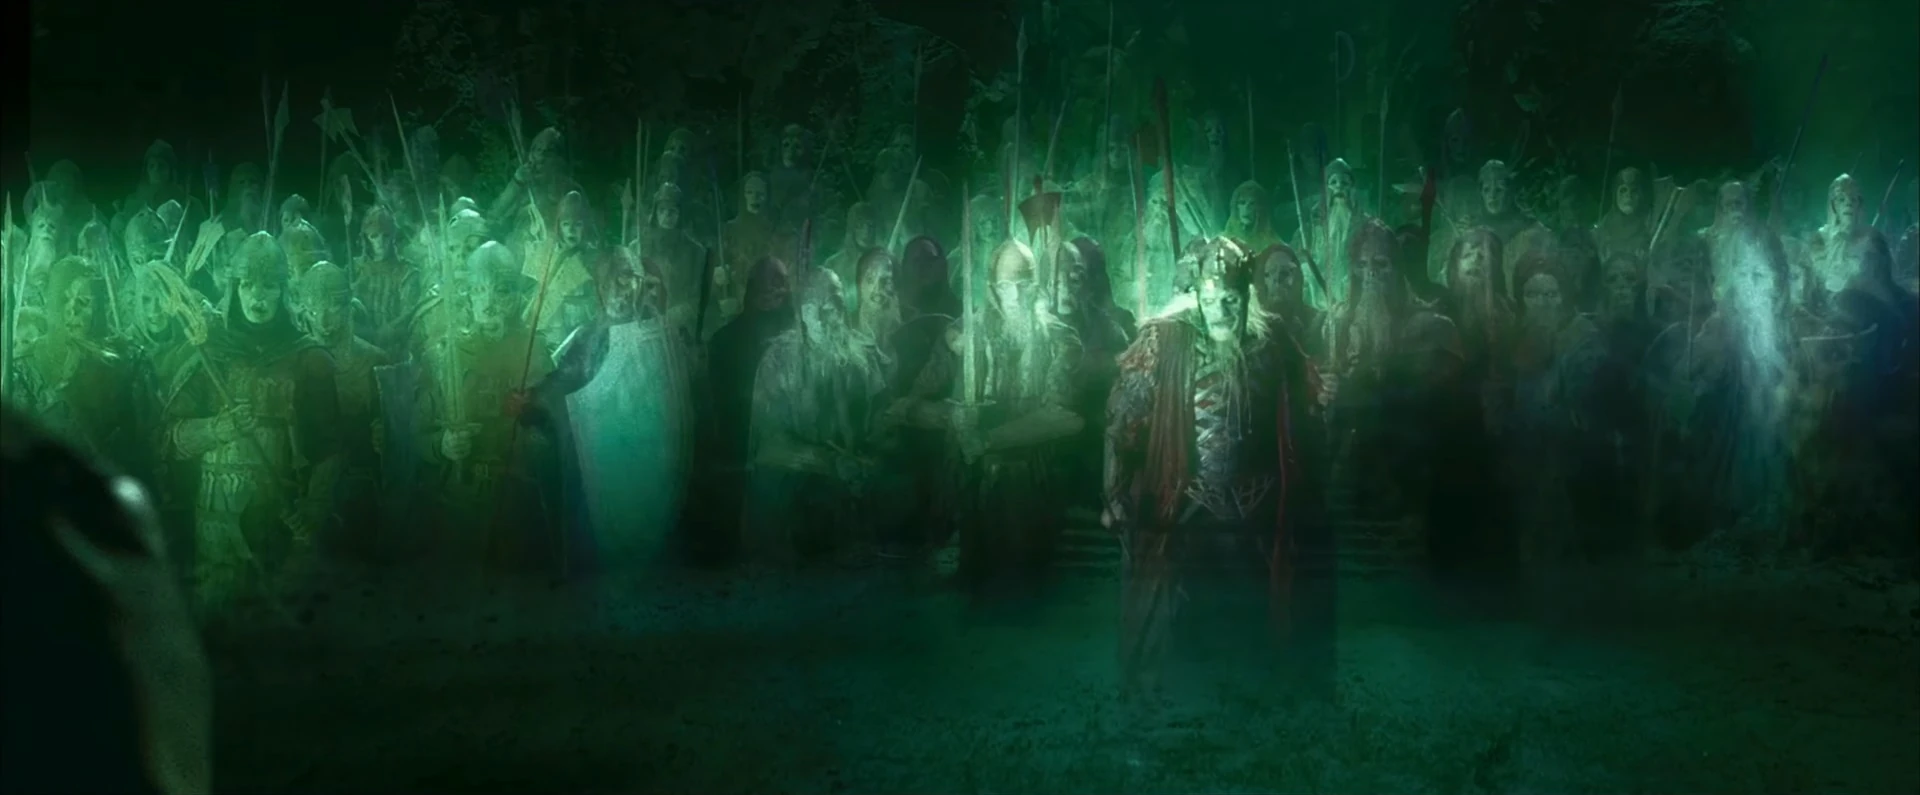
The next of my Middle-earth army discussions focuses on an army that is from the exact same part of the books as the Grey Company, but behaves very differently both on the table and in the movies (because they completely replace the Grey Company in the movies, much to my chagrin). The Dead of Dunharrow are an elite army, but still double the model count of the Grey Company, and rely on a lot more trickery and downright dirty play to function. This discussion I will talk about both the regular Dunharrow list and the Legendary Legion for them, Return of the King. Both have their merits but I personally feel the Return of the King version is almost entirely better purely because it has more options and a better bonus, despite being locked into more expensive heroes.


Army Rules
The regular army rules are quite simple and come from the time before Heralds of the Dead were a thing, matching the other "single hero" armies. The King of the Dead gets the amazing bonus of Harbinger of Evil, which on an army that has Terror and wounds against courage is just insanely good value, and warbands of 8 or more warriors don't need a hero to lead them (one of them is chosen as the leader for deployment). It's good as a bonus, not fantastic but it is something I would make sure to always have when using these models as the Harbinger of Evil is huge.
The Return of the King bonus is similar in that the King still gets Harbinger of Evil, but it loses the warband rule to instead give some other bonuses. You must take Aragorn and the King in this list, and Aragorn gets Anduril for free, but Aragorn counts as a 6" range banner to all friendly Spirits (while not being a banner- important for scenarios that affect this) and Aragorn, Legolas and Gimli can all lead warbands of Spirits in this list. No mount options and no armour for Aragorn, but otherwise the wargear options are the same as in their normal incarnations. This one is not strictly better than "Dead of Dunharrow+allied Aragorn" but it does have some major bonuses to compensate for the things you lose (banner and free Anduril plus being able to lead troops vs mount and armour on Aragorn) so in my opinion the Legendary Legion sneaks ahead.
They also have a few rules they all share with each other, namely Terror (courage check to charge them), Blades of the Dead (they wound vs Courage not Defence) and Spectral Walk (water is treated as open ground). These all combine to give them a real ghostly feel as they should and makes them pretty good in combination with their other abilities.

Models
King of the Dead- The main hero of the Army of the Dead, the King is an excellent lynchpin piece in the crew who will not go down easily. His main draw is bringing Harbinger of Evil with the army bonus so the entire army is both harder to charge and wound better, and this bonus is amazing against most Evil armies which are low courage. His Fight of 5 is respectable but not amazing, although 2 attacks at strength 4 wounding against courage means he should be wounding on 6s at absolute worst, but most often 4s or 5s with his Harbinger debuff. This is also combined with the fact he has Drain Soul so if one wound goes through the target is dead, meaning he is an excellent model to have in combats against low Fate heroes or lower Fight monsters he can instantly kill. His Might is low at 1, but for 100 points with 6 Will and 3 Fate that is by design and honestly quite fair given the rest of his kit.

Heralds of the Dead- a smaller hero option added in Gondor at War, the Heralds are really still something you take after the King because of how much the army bonus and their own rules benefit him. 70 points (75 after shield) buys you what is basically a Warrior of the Dead Captain (higher Fight, Strength, Wounds and Attacks). Although it has no extra Might, they have 2 Fate which should keep them around, and 3 Will that can be given to the King to use as Might points if they are within 3". This is huge if you're not taking Aragorn, because it lets you use potentially 4 times the Might you would have before (even more if you take extra Heralds) so you can do a lot more to affect the flow of the game. They also have Pennants of the Dead which give friendly Spirits within 3" of them Resistant to Magic, which is situational but at the same time well worth having when you need it.
Warriors of the Dead- High defence, Terror and high courage are all things that are excellent to have in any case, and the Warriors bring all 3. Defence 7 (8 after shield) means they are tough to crack and although Fight 3 is somewhat low they make up for it by having Blades of the Dead for when they do wound, albeit not with the instakill of the King. Spears are a great option on them, although the kit comes with only a few, and the banner is a mandatory option in higher point games outside of the Legendary Legion.
Riders of the Dead- Warriors of the Dead with the shield built in, but they also get a special horse that is defence 6 and a Spirit. Being effectively armoured on the horse is nice, especially when the Riders are natively defence 8, but the big thing is that they are faster than anything else in the army so are a great piece to quickly reach objectives or to flank an opponent. At 24 points they are quite steep, but their value is well worth it. The speed is slightly worse in the way that it means they might not always be in the Harbinger bubble like the rest of the army, and almost certainly away from banners, but they are more objective pieces than offence anyway IMO.

The Return of the King Added Options
Aragorn (Strider)- Same as in Grey Company, Aragorn is pretty much the key piece of this army for a few reasons. Being a 6" banner to Spirit models keeps them effective for their higher cost (while not affecting himself, Legolas or Gimli) and his Might stores help shore up the single biggest weakness of the Dead as an army- Heroic Move and March helping a ton. His hitting strength with Anduril isn't as fantastic given Blades of the Dead on everything else, but it does help a lot against higher courage models that you can't just punch through armour. The biggest weakness of Aragorn in this army is no access to armour so he is stuck at defence 5 and thus if he loses fights he is likely to get mauled quickly, but he shouldn't lose fights in most cases with his rules. The most obvious, but also the easiest, trick with Aragorn is to have Warriors of the Dead sit behind him with spears to support, because then Aragorn still gets the benefit of his banner effect and can get cheeky extra strikes through with the spears on important targets.

Legolas- The sniper here is far more valuable than in Grey Company, because Dunharrow have no native shooting without either allying in Rangers (and thus Aragorn, who can also just buy a bow). The benefit of not only having some shooting, but incredibly accurate shooting is a big boon in being able to pick out key pieces and hurt them before lines clash, which is something the Dead can't do alone. Legolas I rate far higher in this army than in Grey Company for this reason because it does so much more that isn't found anywhere else.

Gimli- My opinion on Gimli in the Return of the King list is complete opposite to him in Grey Company because of what is around him. Being a high defence melee damage hero in an army of high defence melee warriors isn't as great as in an army of glass cannons, and compared to Legolas he is really just doubling down on what the Dead already do just with the benefit of being a hero. He's useful against higher courage models, same as Aragorn, but it just isn't enough to justify him in all cases.

Example Lists

400
Aragorn (Strider)
-Anduril
Warband
2 Warriors of the Dead
-Spear
-Shield
3 Warriors of the Dead
-Shield

King of the Dead
Warband
2 Warriors of the Dead
-Spear
-Shield
2 Warriors of the Dead
-Shield
Not high model count, but it's about as good as it gets in 400 points IMO. At this level there will be a lot more cheap models present to bump up break points and simply because it's hard to fit lots of heroes, so your lower model count shouldn't matter too much because it will be highly effective.

500
Aragorn (Strider)
-Anduril
-Elven Cloak
Warband
3 Warriors of the Dead
-Spear
-Shield
5 Warriors of the Dead
-Shield

King of the Dead
Warband
3 Warriors of the Dead
-Spear
-Shield
4 Warriors of the Dead
-Shield
Basically the same list as above, but with boosted numbers. Same idea, just with more of it on the table. 

600
Aragorn (Strider)
-Anduril
-Elven Cloak
Warband
3 Warriors of the Dead
-Spear
-Shield
5 Warriors of the Dead
-Shield

King of the Dead
Warband
3 Warriors of the Dead
-Spear
-Shield
4 Warriors of the Dead
-Shield

Legolas
-Armour
Again building off of the last list, this just adds Legolas for shooting where needed. 

750
Three Hunters
Aragorn (Strider)
-Anduril
-Elven Cloak
Warband
3 Warriors of the Dead
-Spear
-Shield
4 Warriors of the Dead
-Shield

Gimli

Legolas
-Armour
Warband
4 Warriors of the Dead
-Shield

King of the Dead
Warband
3 Warriors of the Dead
-Spear
-Shield
4 Warriors of the Dead
-Shield
The intention of this list is to stay themed towards the initial charge, while also being low in actual purchases. Using only a single box of Warriors plus the heroes you get a full 750 point army that looks good, is thematic and can hold up on the table. 

Riders of the Dead
Aragorn (Strider)
-Anduril
-Elven Cloak
Warband
3 Warriors of the Dead
-Spear
-Shield
4 Warriors of the Dead
-Shield
2 Riders of the Dead

King of the Dead
Warband
3 Warriors of the Dead
-Spear
-Shield
4 Warriors of the Dead
-Shield
2 Riders of the Dead

Legolas
-Armour
-Elven Cloak
Warband
4 Warriors of the Dead
-Shield
Similar list style, but replacing Gimli with 4 Riders of the Dead. This adds some speed and objective grabbing to the army, but can also give some flanking punch and linebreaking when needed as well with the strength of the cavalry.